“Starter for 10” – a phrase that evokes thoughts of  Paxo berating some poor swot, or Bambi and the Scumbags. But what we have now is a few tips to get started with on Windows 10, and a promise of more to follow in due course (and maybe a picture round). If you have a favourite tweak or trick, please send it across and you’ll be covered in glory in some future missive.
Anyway, hot on the heels of the unveiling of Windows 10 last week came the availability of the Technical Preview (or Technical Preview 2 as it’s being known unofficially by some). It’s available publicly & free to everyone who signs up as a Windows Insider on here.
Most obvious changes
There are a few biggies with Windows 10 – the Start Screen has gone, and been replaced with a new Start Menu that includes Live Tiles as well as the Apps List beloved of Windows 7 users. Some Windows 8 users aren’t too pleased with what feels like a step back to the old way of doing things, but do bear in mind that this is still a preview and things will change. And there’s a lot more besides the Start menu too…
 Modern apps – can now run in a window as well as full screen.
Charms – gone (though there is a context menu at the top of Modern app windows, that gives access to the charms, but the old swipe-from-the-right is gone).
Settings menu – fairly different (and quite a bit nicer – more like a Modern app take on the old Win7 control panel).
 If you put your Taskbar on the side of the screen instead of the bottom (an approach which is arguably better use of screen real estate if you have a widescreen monitor or laptop display), then pressing the Windows Key to get the Start menu up won’t let you type the names of apps or other things to search. Windows 7 allowed this with a Search box on the start menu, and Windows 8 allowed you to just start typing on the Start Screen to do the same thing. If the task bar in Windows 10 TP2 is on the bottom of the screen, pressing the Windows Key shows a text box on the taskbar and you can start typing right away.
There is an icon under or to the left of the Start button which invokes a Search box, so if you like to  have a vertical taskbar then just get used to clicking that, or pressing WindowsKey+S to invoke the search. If you’re outside of the US, you’ll probably end up seeing that the Blue One isn’t yet available.

If you’re particularly keen to have Cortana on your desktop, you can set your Region &  language to United States and English (US) by going into the Time & language section of the new Settings app, change the region, add English (United States) as a language, then make it primary.
This does mean you’ll be forever fighting the keyboard layout (or press WindowsKey+Space to quickly switch between US English and your normal one), or the alternative might be to just wait until some future update rolls out Cortana to non-US English speakers and maybe even other languages too.
Windows Insiders can set how aggressively they want to receive subsequent updates to the preview – known as flighting – which should be regular in their appearance, and will be distributed via Windows Update for the first time. Just go into the Update & recovery section of the Settings app, and look under Advanced Settings.
 Is this the final monolithic release of Windows? According to Ed Bott, at least, it will be. We’ve already announced that it’ll be free for the first year after release, to Windows 7 and 8.x users. This means that for the first year, the upgrade will be freely available, not that there’s some plot to start billing people after the first year or usage…
With Windows 10 being made available via Windows Update to Win7 and Win8.x users, it’s quite possible it could achieve a high %age of users within the first year after release, and after that, who knows what the arrangements would be for laggards to upgrade.
It’s been already confirmed, though, that the updates will be free for the life of the machine it’s being installed on.
 Well,
Well,  There are a few particularly cool additions; like the ability to group icons on your home screen into folders, where a tap on the group will expand it out into a s
 ection with larger tiles so you can start the apps quickly. It’s one extra tap on the home screen but it means you can get quicker access to key apps without needing to scroll around on the usual list of apps.
  action center

 Once you’ve photographed the card, you can choose if you want to select & use it, delete it and try again, or possibly add another image – so if your card has info on both sides or you want to batch people from the same company up in one go, then you can have multiple images per contact page.
  Happy New Year! For many of us, time to chuck out trees, and pack away any and all decorations, never to be seen again until December ‘15. Before you recycle the cards you may have received over the holiday season, here’s a quick way of using Outlook to make the job of sending your cards that bit easier.
 Create a new view
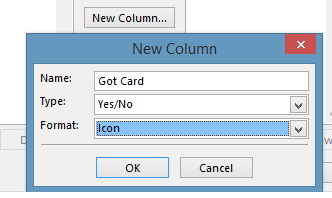 track interesting bits of info – like whether you sent a card to this contact, and if you got one in return. Click on the New Column button and for the name enter Got Card, then choose Type Yes/No and leave Format as Icon. Press OK to create, and repeat the process for the Sent Card field.
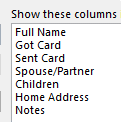 All Contact fields from the “select available columns…” drop-down box, then pick some of the more esoteric contact fields that already exist – Spouse/Partner and Children fields will let you remember who to make the cards out to, and Home Address and Notes are pretty self-explanatory.
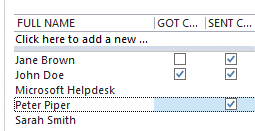
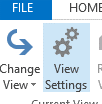 OK, now we have a quorum of contacts tagged with Got & Sent attributes, go into View Settings and click the Filter button, then switch to the Advanced pane. From
 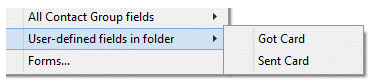 the Field drop-down box, choose User-defined fields in folder and add Got Card.
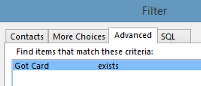 want to change the Sort order to Full Name.
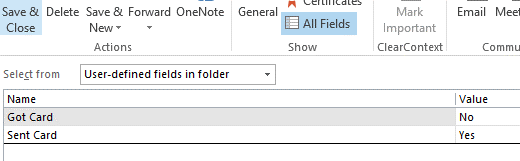 If you want to continue adding contacts to the list, simply open your existing contact (maybe from the main Outlook contacts view), then click on All Fields, and select the fields from the user-defined fields in folder – you can then set Yes or No for each of the custom fields, and that contact will now show up in your Christmas Cards view.
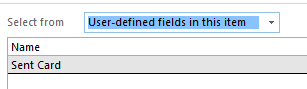
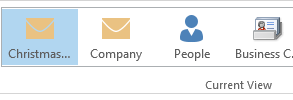 So what’s the point of all this faffing about? Well, in 11 months’ time when you come to do your next round of cards, just select the view in Outlook and if you select File / Print and select Table Style, you’ll get a nice sheet or two of all the details and addresses you’ll need to write all your cards.