|
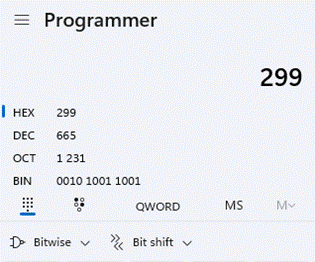
Last week’s ToW was the six-hund Other numbers attract a certain amount of superstition – some tall buildings don’t have a thirteenth floor, for example, and even big companies like Microsoft have been known to
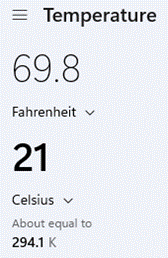
But look at the hamburger menu on the top left and you’ll see so much more – from Programmer functions to convert numbers from There’s a neat date calculator too, so you don’t need to resort to using an Excel formula to count how many days there are between two dates. Back in Standard mode, you’ll see the history of your calculations on the right side, and you can use the Memory functions to store multiple numbers for future use; much better than the old one-and-done M- If you have a full-sized keyboard, you’ll also probably have a NumLock key – that turns the numerical keypad on the right side on and off. In the early days of the PC, smaller keyboards didn’t have separate cursor keys, so these were sited on the keypad. In order to use these cursor functions – and the others, often doubled-up PgUp / PgDn etc – you’d switch NumLock off. And then swear when you went to use the numerical pad to quickly enter a number into some DOS application, only to find you’ve moved the blinking cursor around instead. *convert each of the 8-bit binary numbers in the t-shirt to decimal; assuming the decimal number is the ASCII code corresponding to a letter, open a new blank doc in Word, and holding down the ALT key, enter the decimal number on your numeric keypad. Oh, if you’ve only got a laptop with no separate Numlock/keypad, bad luck. |
Month: January 2023
665 – Mind your screenshots
 Screen-grabbing has been around in some forms since the earliest days of the IBM PC – there is a PrtScn key on most keyboards, for example. Back in the day it would have sent the contents of the screen to a physical printer but later might save the info to a file or copy it to the clipboard.
Windows has had a screen grabbing utility for a while called Snipping Tool, which was replaced with a new tool called Snip & Sketch. The gist of these tools was that pressing some key combo (eg SHIFT+WindowsKey+S) would grab a portion of the screen and copy it into the clipboard. Snip & Sketch ultimately gave way to a new version, called, er, Snipping Tool. There have been many ways to take screen shots over time.
![]()
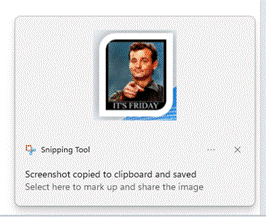 The latest iteration of the app throws a toolbar at the top of the screen when invoked with SHIFT+WIN+S, and gives a variety of options on how to grab that screenshot. You can also set Windows to use the physical PrtScn key to do the same in case you forget the shortcut combo.
After completing it, you’ll see a pop-up in the lower right to tell you that it has completed.
In previous versions, if you wanted to manipulate or save the screen grab, you’d need to click quickly on that toast to then launch the Snipping Tool UI with the grab inside, or else you’d need to paste the image that is now in the clipboard into another image manipulation tool and modify or save it to a file from there. Annoyingly, there’s never been an option to paste what’s in the clipboard into the Snipping Tool’s UI, so you could edit or save it quickly.
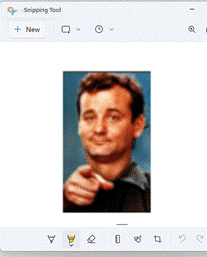 An alternative approach would be to start the Snipping Tool first and initiate the screen-grab from within; you could make some simple tweaks and highlights (like cropping it, or circling a part of the screen in red ink) from there. Kicking off the snipping from within the tool gives you other options too – like grabbing in a few seconds, to give you time to ready the app you’re trying to capture.
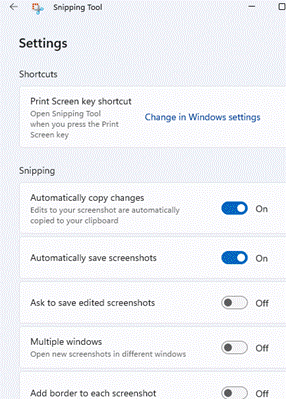 A new feature to the Snipping Tool is the default setting that it saves snips to a “Screenshots” folder; it’s configured in the Tool itself, should you want to disable it.
The Screenshots folder itself is within your “Pictures” folder, unless you’ve decided to move it somewhere else (if you’re that way inclined, open the Pictures folder, right-click on Screenshots and under the Location tab, click Move to find a new home for it).
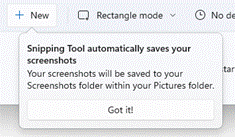 It’s worth keeping an occasional eye on the size of the Screenshots folder, as it could well have hundreds of grabs totalling many megabytes of data. Screen grab files are named with the date and time in the filename, so you can easily get to the latest one by opening the folder and pressing the Home or End key (depending on how you have it sorted). Feel free to delete any you don’t need.
 The … menu in the top right of the Snipping Tool lets you quickly find your way to the Screenshots folder directly, or if you press WindowsKey+R and enter shell:screenshots, it’ll open in a new Explorer window.
If you favour command lines in general, you can also start the Snipping Tool by pressing Win+R and entering ms-screensketch: (including the comma) to run the full UI or ms-screenclip: to jump straight to the capture just as if you’d pressed SHIFT+Win+S.
664 – Android apps on Windows
|
At one point, there were calls that Windows Phone should be able to run Android apps in emulation, or that Microsoft should embrace Android in other ways. Recent years have seen Microsoft publish a profusion of Android apps, including the excellent Launcher, which takes some of the ideas honed in the Windows Phone UI and makes them available to just about any Android phone. When the dual-screen Surface Duo phone appeared, it was the first time Microsoft had shipped a device running Android as the base operating system. Recent speculation on the future of the Surface Duo 3 might point to a different form factor, but it’s still very likely going to be running the Android OS. On the desktop, Windows 11 has been offering Android apps to many users for a little while. Similar in some ways to Windows Subsystem for Linux, which basically lets you run a fully-fledged Linux machine inside your Windows PC, the Windows Subsystem for Android means running Android in a virtual machine and allowing apps to appear in a window alongside native Windows apps.
The Amazon Appstore app itself is a bit crude – it doesn’t offer much opportunity to filter and sort the apps it presents, so it’s not easy to wade through the many stupid games to find real apps you might want to use. It’s maybe better to peruse what’s available through a browser, and then search specifically within the Appstore app for the app you want to add.
If you wanted to use Android apps that are not published through the curated Amazon store, you’d need to have access to the Google Play store, and that’s not officially an option with the Windows Subsystem for Android. There are numerous hacks online to enable Google Play Services (and thus the Googley Store) but getting it installed and running is convoluted, and at least one script has already been subverted with malware, so might be a risky endeavour too. You might want to try running BlueStacks or another Android emulator, to get access to the Google Play store. |
663 – Optimize Edge start screen
 Happy New Year! Do you have any resolutions that you’ve decided to follow, other than the usual (eat less, move more, try all you can to write 2023 instead of 2022)? How about cleansing your web browser start up screen to something more useful and/or less distracting?
With the Edge browser, the default New Tab Page (or NTP) presents a configurable and sometimes useful way to display information, however the source of news articles and the advertising that is shown alongside can sometimes be, er, challenging.
Clickbait
Third party advertising aggregators take sponsored content from an originator and present it as an advert. This presents a problem for the sites that choose to sell advertising space – in tiles mixed with legitimate sources in the likes of the NTP, or in chumbox “Recommended for You” type content at the bottom or side of articles.
Some of the ads often lead users to a site which will do more than try to sell them something – some try to get them to install browser addons, show faux review sites recommending dubious-at-best products, or fraudulently push get rich quick schemes and the like.
 If the originator keeps foisting nonsense adverts with poor quality visuals and clickbait headlines through the aggregator, the content owner who relies on the revenue stream from the ads can complain and have it blocked – it doesn’t do their reputation any good if their site is littered with stupid adverts.
 Ad blockers don’t work on the Edge new tab page, but you can report a dodgy ad by clicking the ellipsis on the top right of the tile. Or submit a report here. This is a whack-a-mole game in a modern sense, since even if the original is blocked they may just appear the next day on a different URL but with substantially the same garbage content.
If this kind of insidious spam drains your energy, there are things you can do to minimize or remove the nonsense, even without switching to a different browser.
 Looking at the Edge NTP, if you are using a browser profile signed in with a Microsoft 365 account, you might see “Work” or similar in the Enterprise page; it’s extremely useful and quite customizable, and administrators could make Edge default to that tab. If users click on My Feed, they’ll get the same view as a non-Enterprise tab, and it will stick for that user on the next new tab.

 You can customize the “My Feed” section by choosing to Personalise your content selection and how you want it laid out, but if you want to switch the whole lot off altogether then look on the settings cog on the top right.
Switching the clickbait off will mean you get a beautiful Bing image taking up most of the screen (click the double-headed arrow on the bottom right to find out what it is), with a search bar and some collapsible quick links tiles pointing to pinned or recently-used sites, and other subtle info points like weather or stock prices.
Replace NTP altogether
There is no option within Edge to set what the New Tab Page should be – it’s only possible to tweak the one that’s there already. Install a simple extension like Custom New Tab, however, and you can point it to any URL you like (a largely clickbait and ad-free news source like Google News might be one choice, or a customized set of sources from something like Feedly). After installing and configuring, you’ll need to deal with Edge checking if you really want to replace the NTP and making sure that it’s not being subverted by some malicious code. Just say Yes.
A final nail in the NTP could be to just silence all the distractions by installing the Blank New Tab extension: that’s the equivalent of setting the new tab page to be about:blank.
If you’re still using Edge and have replaced the NTP with something else, yet feel like checking in on either your M365/Enterprise page or you’d like to outrage yourself over the stupid adverts polluting the “My Feed” section, just drop https://ntp.msn.com/edge/ntp?query=enterprise into the address bar to get the classic NTP experience.


