|
The first Tip o’ the Week was sent on Friday 4th December 2009, starting life in response to the Microsoft annual employee survey, where team members could give feedback on how things are going. One common complaint was that tools they had to use – internal, mostly – were less than ideal, so a local task force was formed to decide on how best practices could be shared amongst a wider group of 50 or so people. “Why not a weekly newsletter?” Quickly, ToW evolved into sharing productivity tips and news about (Microsoft, mainly) technology. Membership to the newsletter spread organically until thousands of people received it every week. The “Best Practice Tip o’ the Week” lost the “Best…” bit by #87, and at #100 became part of an internal Microsoft “Love it” project (and outlasted said project by some years). When it turned #300, ToW gained Bill Murray’s endorsement. Eventually, it went online and onto LinkedIn. In all of this time, the fourth wall was rarely broken. No longer. This IS The End. This is the last ToW. It is time to rest.
ToW has never been about me, it’s always tried to find and share some hopefully useful tips and tricks, often aided by suggestions from readers or even a few who wrote up the sollution themselves, presented in an informal and somewhat irreverant format.
It is now over. It’s been a blast, mostly. Sometimes, more effort went into the side-eye links than the topic in hand.
The best ToWs? Well IMHO, they are (in no particular order):
The emails might be finishing but keep an eye on Tip o’ the Week on LinkedIn as, one day, it might resume. In the meantime, thank you all!
STOP. |
Month: June 2023
687 – Loop de Loop
|
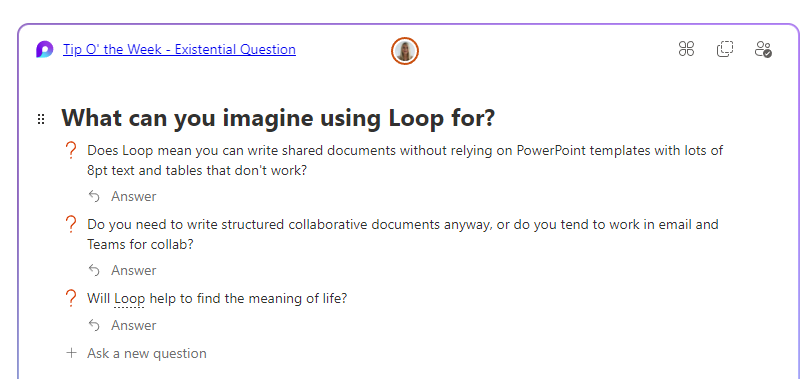
One new application that spring Notion went from a small startup 10 years ago to a multi-billion valuation, despite initially fending off VC cash. The user base is supposedly skewed to teenage-to-mid-30s, though old timers like Paul Thurrott and the team behind the Windows Weekly podcast notably use Notion to manage the prep notes for each episode. He was initially less than complementary when Microsoft unveiled a similar-looking new service, born out of components of the “Fluid Framework” which been unveiled at Build in 2019 as a new way of doing co-authoring on compound documents. Loop is the name given to this new Microsoft 365 collab tool, announced in Loop can be accessed at loop.microsoft.com either by using a “work or school” account as part of M365, or a Microsoft Account to sign-in to a personal version. Loop mobile apps now have support for personal accounts too. Admins in Microsoft 365 environments need to enable Loop for use – if you visit loop.microsoft.com as an end user and it’s not available, you’ll be told as much and asked to find your IT admin to get them to switch it on. Loop components can belong to a workspace which itself has numerous pages – when you create a new page, you’ll see a selection of templates to get you started: … and there’s a larger gallery which has more ideas, basically just pre-built pages with a smattering of ready-configured Loop components. Inevitably, commentators compare Loop and Notion though one major difference is that rather than doing everyting in the online workspace, Loop components can also be shared and embedded within Office documents, emails or in Teams, which is arguably more flexible. If you copy a Loop component to the clipboard and paste it into an email, you’ll see it embedded – though if using a table in your mail (such as is used in some weekly missives to try to control their layout), you’ll be disappointed as it appears you can’t embed Loop components inside a table.
Head over to Example: |
686 – What’s that #:~:text?
|
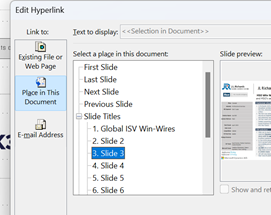
True hypertext documents or applications don’t just link pages to each other, but specific contents – it could be a fly-out or a pop-up with a definition of what a specific term was, or it might be a link that jumps into a particular part of a longer document. Many web pages have bookmarks defined within – eg Wikipedia typically has links on the left side which jump to parts later in the document, and the bookmark is added to the end of the URL – like https://en.wikipedia.org/wiki/Hyperlink#HTML Office docs offer similar things – Word and Outlook have Bookmarks, PowerPoint can have hyperlinks inside slides that jump to a different slide etc. If you look at documents stored on OneDrive or SharePoint, it’s often possible to create a link directly from within the full fat Office application, to a part of that document – eg When dealing with web pages, there are some other tricks you can do to jump straight to a part in the page, even if that page itself has not defined the bookmarks for you to reference like the Wikipedia one above. The WWW Consortium fairly recently defined a standard for handling “Text Fragments”, which means you could link to a specific phrase on a page. Clicking the link will navigate to that point on the page and highlight the text. This is done with a strange looking tag at the end of the URL: #:~:text=whatever.
Example: one of the most-visited articles in the TipoWeek archive, Killing me Softly, part I (a wistful post looking back at some of the Microsoft tech which has ceased to be) has a part which deals with the audio file format, Windows Media Audio – see it on https://tipoweekwp.azurewebsites.net/2016/10/21/tip-o-the-week-350-killing-me-softly-part-i/#:~:text=Windows%20Media%20Audio.
|
685 – Browser searching
|
If you’re using Edge and have Bing as the default search experience – other search engines are available – then you may see the prominent search box in your new tab page, but it’s worth remembering that the address bar at the top of the browser is also a search box. You can jump to the address bar in Edge or Chrome by pressing ALT+D, which also selects the current site’s URL (if there is one) so you can edit it or just replace by typing something else.
Entering a site name and pressing CTRL+ENTER will add the https://www. and .com bits so you don’t need to; therefore, to go to the BBC website, you could press ALT+D bbc CTRL+ENTER and you’d go there directly. Although the address bar will ultimately use your default search engine to query a word or phrase that doesn’t appear to be a web site address, you can force it by starting to type ? in the address bar, then enter your search term after the question mark.
Click Add to include one of your own, using the appropriate site URL while replacing the bit where the search term is specified with %s – eg searching the OneDrive photos section for “dogs” would give a URL of https://photos.onedrive.com/search?q=dogs. Give the Search Engine a shortcut name you want to use and then paste the modified URL and hit save. Now, in this example, typing photos | TAB | cats | ENTER would seach OneDrive for cat pictures. If you are a Microsoft 365 user then you might be able – if it’s been enabled for your tenant – to search internal work documents and Sharepoint sites, just by typing work | TAB | etc. It’s on by default, but admins could also give you custom keywords / shortcut words too.
To quickly jump to that tab, use the up and down keys to select the one you want, and press Enter. |
684 – Teams, Countdown, Go!
|
Back in April 2021, ToW #574 talked about sharing a countdown timer in Teams, if you want to make it clear in a meeting that it’s about to get underway. That was by sharing the application window of a countdown clock, meaning that it would replace any other desktop sharing/slides etc being shown. Also, the timer will loom very large on the screen of everyone watching, which could well be effective though maybe lacking some of the subtlety you’d prefer.
Depending on how you do it, the timer could disappear altogether when it has finished, and you’d carry on with the video as before. You might even want to replace your own camera feed with a backdrop and timer until you’re ready to go and show your face. One recommended way to achieve this effect is to use OBS Studio, open source software which started life as a kind of video manipulation tool aimed at recording or streaming, and has grown to offer a host of features and plugins to modify and manipulate video in real time. It can look a bit scary to start with, but the basics can be picked up quickly. OBS Studio can apply a series of effects to one or more video sources – could be the real-time recording of windows showing a live demo or a physical camera, with some other stuff like a video file, overlaid on top. You can go down a rabbit-hole of effects (like put a real-life green screen behind you, then chroma key a backdrop or video onto your own video feed – see Scott Hanselman’s tutorial for inspiration).
A simple trick could be to add only a countdown video to OBS and then choose the OBS Virtual Camera in Teams; it will display the video instead of your camera feed, and then when you’re ready to get going, just change the video settings in Teams to go back to your own webcam.
There are plenty of sources online for free countdown videos – here or here for example; download the file, add it to OBS as a Media Source and you’re off. If you’d like to take it up a level, here’s a more in-depth tutorial, and you can even script your own custom ones if you like to delver deeper into OBS features. |


