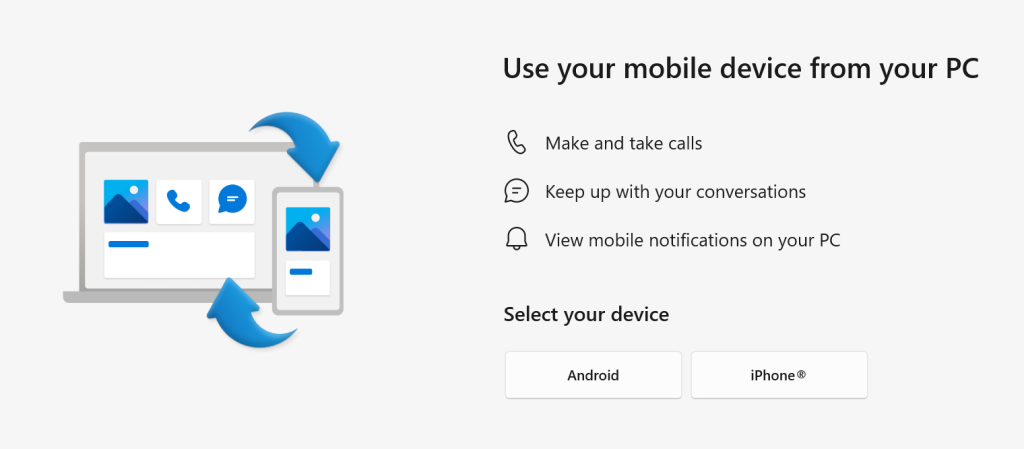
If you’re using a PC with Windows 10 or 11 and you have a smartphone, it’s worth exploring the Microsoft Phone Link app which lets you interact with the handset from your computer.
Microsoft has made several attempts to link phones and PCs, from the Continuum feature at the twilight of Windows Phone’s life (before it was knifed) to a variety of bespoke apps for Samsung devices and ultimately “Your Phone”. The latter has now evolved and expanded to be “Phone Link”. The array of features varies slightly depending on what OS your phone is using, and which manufacturer it originates from.
The app is likely pre-installed on Windows; make sure it’s up to date. It then needs to pair with a companion app called Link to Windows on your phone – either Android or iOS. For step-by-step instructions on how to set it up, see Sync Your Smartphone to Your Windows Computer.
For Android users, arguably the most compelling quick win is being able to easily access Photos without requiring them to have synced to Google Photos or OneDrive first – while the phone is connected to the PC either via Bluetooth or through the same WiFi network, you can interact with the last 2,000 photos on the device’s camera roll, so copying and pasting them into other apps is a snap.
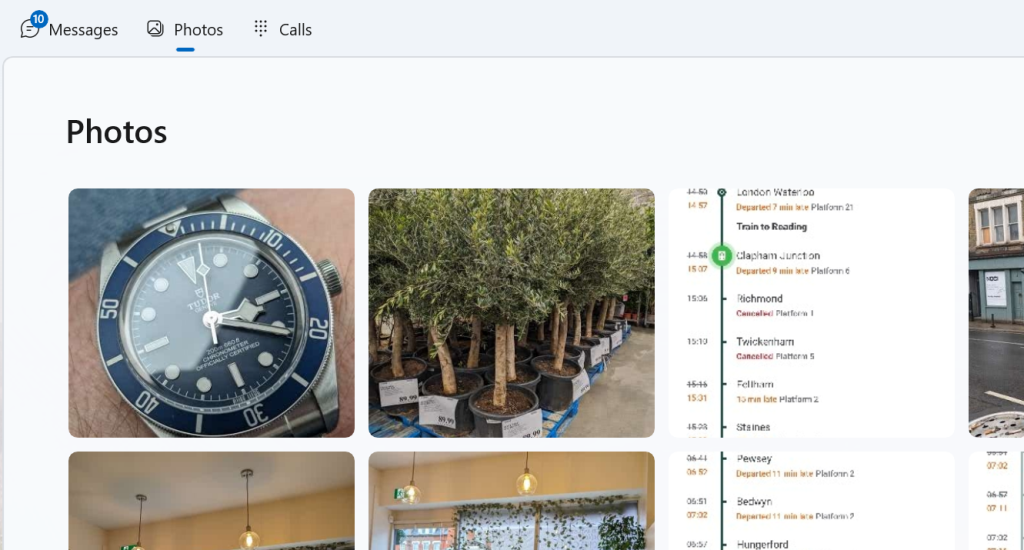
iPhone users will have to use other means to get their hands on pics, at least for now.
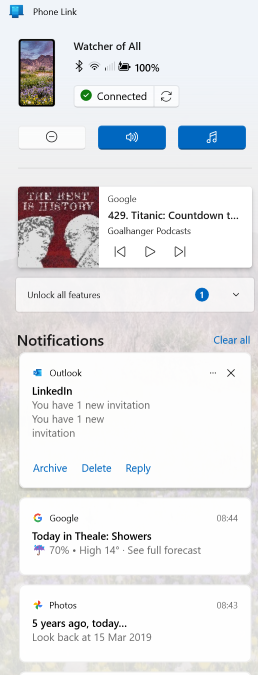
The Phone Link app allows notifications on the device to be seen and managed on PC, which sounds more useful than it really is. It can also set the PC up to use the phone to make and receive calls (think of it like the PC is a smart Bluetooth headset), though some handsets might be a bit flaky. It seems even new phones don’t always provide the right level of support for some features to work well, such as Google nobbling the ability to output to an external display over the USB-C port on Pixel phones (a behaviour which will be fixed, at some point).
Some Android devices will allow you to display and control phone apps on the PC itself (or even mirror the whole phone screen) – which can be very useful, especially if you’re having to input a reasonable amount of text. It’s pretty much always going to be quicker to type on a keyboard than tap on a screen. Other options do abound, though, depending on the apps you use – there’s a native WhatsApp client for the PC, for example, so you could use that rather than relying on Phone Link.
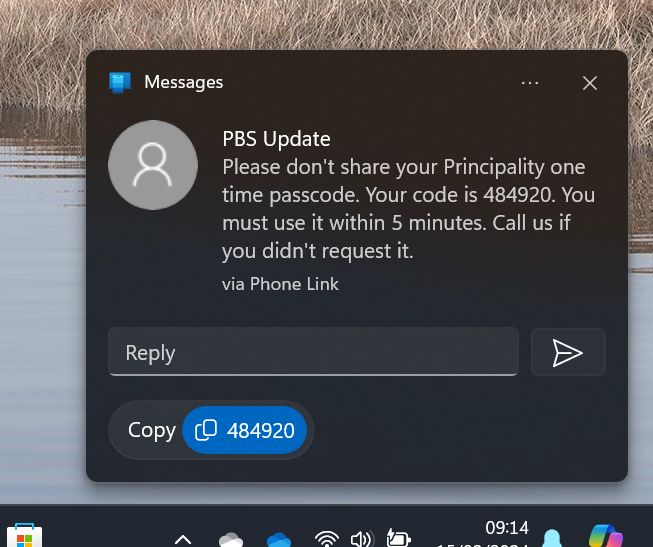
You can use the PC to work with text messages on the phone, even supporting iMessage for Apple devices. Arguably the handiest part is when you get a text message as part of a multi-factor authentication sequence like logging into a bank account. The notification which Phone Link displays includes a “copy” shortcut so you can easily grab the code and paste it into the waiting logon page… even if the phone is on the other side of the room.


![clip_image002[6]](/wp-content/uploads/2022/08/clip_image0026.jpg "clip_image002[6]")
![clip_image004[4]](/wp-content/uploads/2022/08/clip_image0044-1.gif "clip_image004[4]")
![clip_image006[4]](/wp-content/uploads/2022/08/clip_image0064-1.gif "clip_image006[4]")
![clip_image008[4]](/wp-content/uploads/2022/08/clip_image0084-1.gif "clip_image008[4]")
![clip_image010[4]](/wp-content/uploads/2022/08/clip_image0104-1.gif "clip_image010[4]")
![clip_image012[4]](/wp-content/uploads/2022/08/clip_image0124-1.gif "clip_image012[4]")
![clip_image014[4]](/wp-content/uploads/2022/08/clip_image0144.gif "clip_image014[4]")


