 Happy New Year! For many of us, time to chuck out trees, and pack away any and all decorations, never to be seen again until December ‘15. Before you recycle the cards you may have received over the holiday season, here’s a quick way of using Outlook to make the job of sending your cards that bit easier.
It involves creating a new view and a couple of custom fields within the Contacts function in Outlook – as has been mentioned before on ToW, when Outlook views any item (an appointment, a contact, a task etc), all it’s doing is using a particular form to display a bunch of fields. It’s possible to easily extend those items with your own fields and there are form editing capabilities too, but we’re not going to use them today. This tip might look a bit daunting but it’s really quite simple, and it’s something you’ll only have to do once – it persists in your Contacts folder so is available on all PCs.
If you have multiple monitors, then it might help to put this email on the 2nd monitor as you may not be able to easily switch to read the instructions whilst you’re setting things up. Or maybe just print it out.
 Create a new view
Firstly, go into the Contacts folder then select the Views tab, and select Change View, then Manage Views to see a list of views that apply to your Contacts folders. Click the New… on the top right.
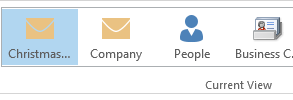
Select Table as the type of view and give it a name like Christmas Cards, then click on OK to create and start editing the new view.
Click the Columns button and remove everything from the “Show these columns” list on the right hand side, except for Full Name.
Now, it’s time to create a couple of new columns which will be visible in the view and can be used to 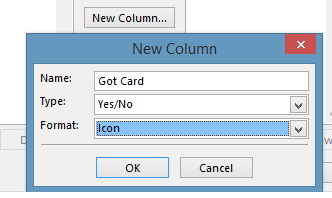 track interesting bits of info – like whether you sent a card to this contact, and if you got one in return. Click on the New Column button and for the name enter Got Card, then choose Type Yes/No and leave Format as Icon. Press OK to create, and repeat the process for the Sent Card field.
Now, select other relevant fields from the chooser on the left – try selecting 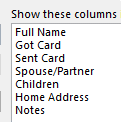 All Contact fields from the “select available columns…” drop-down box, then pick some of the more esoteric contact fields that already exist – Spouse/Partner and Children fields will let you remember who to make the cards out to, and Home Address and Notes are pretty self-explanatory.
Once you’ve created the view, resize the columns as appropriate (elongating address, for example). Now, you’re probably looking at a contacts list that’s got 1,000 entries of people you principally do business with, and a handful of friends you might send cards to. The next trick is to filter out people you want to be in the list.
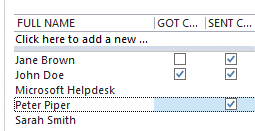
The nice thing about using the Table type view is that you can edit in-line, ie. you don’t need to open up the contacts forms to change the details. Since you’ve just created the Got… and Sent… fields, none of your existing contacts will have a value for any of these fields.
If you click on the Got or Sent fields, you’ll set it to be either yes or no. Try locating a few of your friends in the list and tick these fields, maybe fill in Spouse and Children while you’re at it (and now’s a good time to do that, as you’ll probably have all their names on the cards you received).
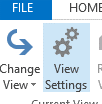 OK, now we have a quorum of contacts tagged with Got & Sent attributes, go into View Settings and click the Filter button, then switch to the Advanced pane. From
 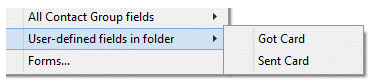 the Field drop-down box, choose User-defined fields in folder and add Got Card.
Change the condition to exists and press Add to List.
Repeat the same process with the Sent Card field, then press OK. Finally, before saving the view, you might 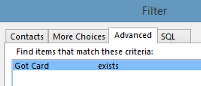 want to change the Sort order to Full Name.
Now if you press OK to save the view, you should see your contacts list filtered to show you only the entries that you have tagged as having some value for both Got Card and Sent Card.
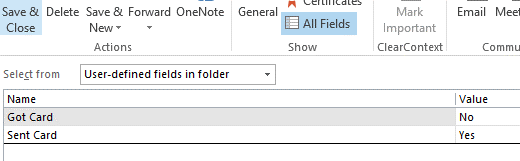 If you want to continue adding contacts to the list, simply open your existing contact (maybe from the main Outlook contacts view), then click on All Fields, and select the fields from the user-defined fields in folder – you can then set Yes or No for each of the custom fields, and that contact will now show up in your Christmas Cards view.
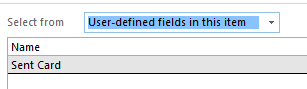
If you want to ditch someone from the list, open their contact, look under All Fields, select from user-defined fields in this item (not user-defined fields in this folder!), select the field and Delete it.
 So what’s the point of all this faffing about? Well, in 11 months’ time when you come to do your next round of cards, just select the view in Outlook and if you select File / Print and select Table Style, you’ll get a nice sheet or two of all the details and addresses you’ll need to write all your cards.

 Remote Power
 As with temperature sensors, there are
  There is a 3rd party app called SmartHome for
 Tip o’ the Week goes
 Microsoft announced recently that the

 Rate and review
  Taking this option fires up the Store app, and navigates directly to the review section where you can assign a 1-5 star rating and give some verbiage should you desire. If you’re going to slate an app that everyone else rates highly, or the opposite, then you really should explain why, so others can benefit from your wisdom or simply write your thoughts off as coming from a blithering idiot.
  If you want to rate apps without actually opening them, you can go into the Store app, select Account | My apps from the menu at the top, then select the appropriate filter from the drop-down boxes, then click or tap on each item to get to its Store page, which includes rating & reviews.
 Windows Phone ratings
 There are many
  If your car has the ability to see your phone’s directory or phone book, then you should see a contact show up in the list (when viewed in the car – it doesn’t actually appear as a contact on the phone itself), called Cortana.
 Many of us will be familiar with using the web browser on our phones – unkindly, one might say that it’s partly due to the fact that Windows Phone users sometimes don’t have a choice, whereas iOS and Android devices might be redirected to install some native app rather than using a browser to view the content.


 Anyway, this tip reprises the topic of the
 To disable the toast from the Mail app, go into the app itseld and bring up the Charms (press WindowsKey+C or swipe from the right if you have a touchscreen, or put your mouse in the top right of the screen). Now select the Settings charm, then Accounts, then go into the account you have set up to your corporate emai (since you can set notifications differently per-account).
 , as it approaches its first birthday. The console started shipping a little while back in a new, Kinect-less (dis-Kinected?) package (
 The October update which rolled out in the middle of the month was quite a big change to how some of the fundamentals of the console work – like Snap, which got a whole lot more useful by being easier to manipulate.
  This week’s tip comes as a direct result of a conversation had over a glass of wine and a plate of food, with Content & Code’s supremo,
 Now, in the same Explorer window, scroll down in the folder list to see the This PC section and right-click on Desktop, then Properties, then look to the Location tab.
 Sense the network:
  In practice, this means that if you set a password on your home WiFi, your pals who have WP8.1 will be able to use your home network without
  needing your password (or, in fact, your permission – they’re your friends, after all…). If you live in an apartment block in the city, you might want to be careful about this as you could well have neighbours you know leeching on your broadband, but if you live in a