 Do you suffer from email overload? The temptation is to get dragged into dealing with all the nonsense internal emails and corporate spam, but it’s worth trying to prioriti(z)|(s)e email from external senders, excepting the genuine bulk guff that you can spot quickly and delete.
Here’s a simple Outlook tip to help; it installs a custom form into your Inbox, which takes some minor faffage, but it’s a one-off process that will stay with your mailbox forever… and it allows you to create rules to prioritise email that comes from outside over the blah-de-blah you get from within.
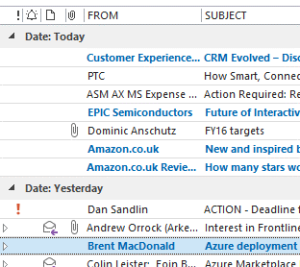
Here’s a Before & After view of the same mailbox… you’ll guess which emails are from external senders…
{NB: this view was carefully constructed for demo purposes – some of the external emails are clearly bulk mail that could easily be deleted filed, but it shows that anything which originated outside and is still in the inbox, is more highlighted than everything that didn’t/isn’t}

Now to Install the form
The next section involves digging around in Outlook options, which will probably involve a fair bit of flicking to and from this window… and although reading the steps in email sounds horribly complex, it’s actually dead easy to follow if you have it step-by-step in front of you… So you might want to print this article out to make it easier to follow …
Firstly, download this ZIP file to your PC. It contains a couple of icon files and the .CFG file which defines a new form in Outlook, and that form exposes as a custom field, one of the deeply-buried properties of email messages.
- Save it in your Downloads folder if you like, then open that location in Windows Explorer,
- Right-click on the ZIP file and choose Extract All.
- Open the folder where the files now live,
- Hold down the SHIFT key and right-click on the SenderAddressType.CFG file, then choose Copy As Path
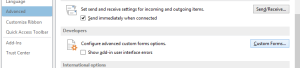 OK, now back in Outlook, go to File | Options | Advanced then scroll down to find the Developers section, and click on Custom Forms…
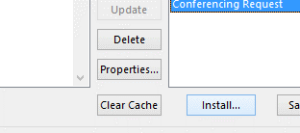 Now, click on the Manage Forms button, and you’ll see a dialog to do just that… click on the button Install, then a dialog box will pop up to look for the form you want to install – paste the location to the .CFG file you Copied as Path above… You should see the Sender Address Type form appear in the list, after which you may Close | OK | OK to get back to main Outlook window.
Alright, now you’ve added a form which will allow you to expose a field – similar to the usual ones like sender or size or subject – which shows the type of address that sent the email. It’s not infallible – some internal mail comes from SMTP systems, but almost all internal email doesn’t – so it’s actually more a way of filtering out most internal mail than it is a way of highlighting everything external.
 Anyway, here’s how to create the above view…
- When in your Inbox, Go to the View tab in the main Outlook window, and look under View Settings – this will now let you tweak the settings of the current view, in the current folder
- Click on the Conditional Formatting button in
 the dialog which pops up – this can set rules on how emails are highlighted, or not, and is what’s used by default to make unread emails bold, or urgent emails red.
 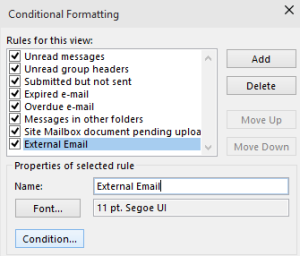 Create a new rule by clicking on Add then give it a name, then click on the Condition button. This now sets the times when the rule will fire – so the best thing to do is go straight to the
 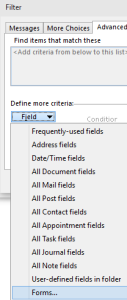 Advanced tab…
- click Field and scroll down to the Forms… option at the very bottom, to choose the form you’ve just installed …
- Select the new Sender’s Email… form,
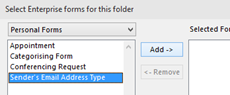 click on Add-> and then Close. This will then allow you to use that form to choose attributes for formatting. If you later chose to create Search Folders, Inbox rules or other filtering within Outlook, the same process would apply.
 - Still at the Field drop-down, now choose the new form from the list and select the field, Sender Address Type.
 This is the one custom field that was added through the whole form shenanigans above – if the sender was internal, it’s probably either blank or EX, if external it’ll be SMTP.
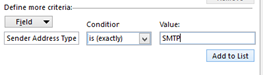 Now, set the criteria – if the Sender Address Type is SMTP, then we want to treat it differently – click Add to List then OK.
- Finally, set the view attributes you’d like on the emails which match this condition –
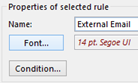 best avoid bold as other rules will probably be setting bold on unread emails, but italics in a different colour and a different size could be a good combination… try it out and if necessary, just go back in here to tweak to your satisfaction.


You may find that the customised view doesn’t show up on every PC, however the form is now installed in your mailbox so should be available everywhere – so if you needed to create new versions of this view, it should be much more straightforward. To edit the view in another folder, repeat the last few steps above (starting from the View tab as above, but this time in your other folder – the form is available all the time so you don’t need to install it again).