|
If we become more effective in some ways, decreasing the time it takes to accomplish mundane stuff, will we spend the regained hours doing more stuff, or just fritter it away meaninglessly? Discuss, ad inifinitum. Quick Time One thing you could do when deciding what to do with all the spare hours the world of Yammer, Slack, Outlook, Skype etc has delivered, is to go right now and uninstall QuickTime from your PC. After 20 years of providing the Windows version, Apple has decided (to quote El Reg) to take QT for a long drive down a country road. The US Dept of Homeland Security advises immediate removal of QuickTime, since it contains zero-day vulnerabilities which Apple will not fix, ever. Whilst thinking about security, wonder about the effectiveness of the Thousands Standing Around at US airports, or consider if you really need to change your passwords after all. Find Time A few months ago, a Microsoft Garage project released FindTime, an addin to Outlook and Office365 which allows a meeting organiser to send a request out to a group of people, to vote for when the best time to hold the meeting is. The best part is, the recipients don’t need to be using Office365, don’t even need to be in the same company – so you could ask your customers to join in the negotiation for when the best time to meet would be. |
Month: April 2016


Tip o’ the Week #324 – Delve into something new
|
If you can get access to Delve (either on https://delve.office.com or via https://portal.office.com, depending on your account and level of access), then it’s well worth playing with it for a while, especially if you work in a large company like Microsoft, where all sorts of interesting stuff is being saved onto shared document folders. One downside of Delve might be that nervous Nellies will stop putting their documents into shared areas in the fear that other people will read them, or that the default-to-open (for their internal staff) culture that typically pervades lots of companies will flip to an access-only-on-a-need-to-know-bassist. Delve lets you see what documents are popular, what people you are connected with are doing, and lets you search by document content or by author. Want to see what FY17 holds for your org? Wondering what juicy PPTs your VP has been editing lately…?
Announced recently, the Delve Analytics function (available to O365 users based on their license type), shows you not just what other people are doing, but how you are performing too. The Delve Analytics dashboard and corresponding Outlook Addin lets you see how you’re spending your time, and who you’re spending it with, promising to help you make the most of it.
The Outlook addin surfaces Delve info within Outlook’s reading pane, so as long as you’re looking at colleagues who’re in the same Office 365 environment (which might be an issue in MSIT, where there are several tenants), you’ll see stats about how often and effectively you email with each other. Here’s one example; judge not any of the numbers…
Eek. 3h 31m average response time. Must try harder to do less email and do more work. |

 Have a Delve…

Tip o’ the Week 323 – Some lesser-known Excel spreadsheetery
|
Spreadsheets did – or do, still – make the modern IT world go round. As it happens, VisiCalc powered the Jobs’n’Woz enterprise to mass success, as Apple IIs were selling (even fully kitted out at $5k+ a time, in the 1980s) to middle managers who were sick of the Data Processing department taking ages to turn around financial reports, so they took to sticking an Apple on their desk and doing the sums themselves. If you’re interested in all of this, see here. This threat from Valley spooked Big Blue enough to worry about the mainframe franchise being under threat, and after a couple of false starts and a skunkworks project called Chess, the PC was born. Lotus software quickly became the de facto spreadsheet provider running on PC-DOS (as it was so fast, meaning the spreadsheet jockeys ditched their Apple IIs and flocked to PCs), but Lotus got distracted with OS/2 while Microsoft’s Windows 3.0 started to gain traction. In place of WordPerfect, Lotus 1-2-3 and dBase, the 1st party Microsoft Office suite took early and full advantage of Windows, ultimately powering Office to the front. So, Excel trumped 1-2-3, just as Lotus eclipsed VisiCalc. That means Microsoft Excel for Windows has been around for a very long time, and there are many functions you’ve probably never used – but there are loads of useful tips that could make your life easier. Here are a few…
|


Tip o’ the Week 322 – Booking meeting rooms (again)
|
Building on last week’s ToW and on a topic that has been covered some time ago, let’s dig deep into the bowels of Outlook, going back almost 20 years to Outlook Forms to solve a very particular problem. As per ToWs passim (like Eyes), every item (message, contact, appointment etc) you open in Outlook is a bag of data fields that are rendered in front of your eyes by a form. It’s possible to design and publish custom forms to do more stuff, or in this instance, to fulfil a specific function and by pre-populating some data and by hiding other extraneous information. Show meeting rooms Meeting rooms are often set up as bookable resources within Exchange & Outlook – so you invite the room to your meeting and it automatically accepts, meaning you’ve reserved that resource. When trying to figure which rooms are free, if you only have a few meeting rooms then it might be easy enough to just show their calendars from the Room List (eg here). If you’re using a more modern version of Outlook and/or have more than a few rooms to deal with, then Room Finder is more useful. See here and here.
As an end-user, though, you may find that your IT department doesn’t manage the rooms the way you’d like – in a new building, for example, there might be no room list published – so not much help if you’re trying to book a room. Here’s a somewhat hacked-up solution which might be useful in other ways, though – it involves customising a form of your own, with your favourite rooms shown, so you can quickly check their availability. You could do the same thing with a group of people too, should you want. Let’s get building Start by going into your Calendar, and create a blank Appointment form, then follow the steps for adding the Design This Form command to the Quick Access Toolbar (or right-click the Ribbon when in a new
Now you’ll have switched to a form
Now that’s all done, Publish the new form as a custom name (something like <building name> Meeting Rooms) then hit the Publish button. This will now save the form into your own Calendar folder, so it will be available from any PC running Outlook.
You’ll now see the custom form will display only the grid view of room availability, with all of the rooms ticked. You won’t actually use this Make sure you close down the custom form without saving or sending anything. This approach is nicely flexible in that you can create your own “lists” of favourite rooms (eg all large customer rooms with AV, or all rooms kitted out with Surface Hub, devices in any location etc). If your desired selection changes, you can create a new form and Publish As using the name of an existing one to replace it (or open the existing custom form, enter Design This Form mode again, go to the Appointment tab and edit the list of invitees there). If you’d like to delete old forms then from the main Outlook window, go into File | Options | Advanced | Developers | Custom Forms | Manage Forms, and click on Set… to navigate to your own calendar folder, then delete the forms you no longer need. Phew. |


Tip o’ the Week 321 – Quick Access Toolbar customisation
 Most of us will have used the Quick Access Toolbar in Windows Office apps – even if only to click the floppy disk icon to save documents, which, like many others, makes no sense to modern life. The QAT (not to be confused with other, phonetically similar terms) lets you dock commonly-used commands to be constantly available on the top corner of your favourite Office apps. Most of us will have used the Quick Access Toolbar in Windows Office apps – even if only to click the floppy disk icon to save documents, which, like many others, makes no sense to modern life. The QAT (not to be confused with other, phonetically similar terms) lets you dock commonly-used commands to be constantly available on the top corner of your favourite Office apps.
In Outlook, try opening a message that someone else sent you (this one would be a good start); go to the QAT and click This will now add a new icon to the QAT, which will let you “design” whichever form you have open. In Outlook, a “form” is used to display In fact, adding to appointments is the best place to do it, since you can show the date and time that an appointment was created in your calendar; if you just find an appointment that you can’t remember the context of, you could quickly show the date/time you created it and that might help figure out how valid it is. If you have a meeting that someone invited you to, you’ll easily see the date/time it was sent, but if you’re the organiser, you won’t – unless you use something like Design This Form, then navigate to All Fields and choose Date/Time fields to show all the common date or time attributes of that form. For more context, this topic was covered some time ago on the Electric Wand blog and a previous tip, #102.
Whilst you’re playing with any application’s QAT, it’s worth having a look through the other commands you might want to add – like while still in OneNote, try your favourite OneTastic macros, for example.
This opens the door to being able to scan in old paper notebooks for easier reference/shelf space clearance, and ditch the dead tree notebooks for digital. If you’re like controversial car design Chris Bangle, you may beg to differ.
|


 the down arrow to the far right side, choose More Commands… and then select “Developer Tab” from the Choose commands option. Now, pick the Design this Form option from the list and Add to the

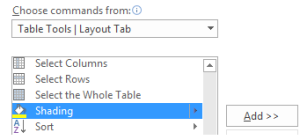 status reporting, it’s quite handy to be able to colour cells or rows in tables to show their status, but the menu option to set the colour would need you to go into the table menu. To quickly add to the QAT for future easy access, click the down arrow / More Commands… / choose the Table Tools tab and look for Shading, then Add>> and OK.
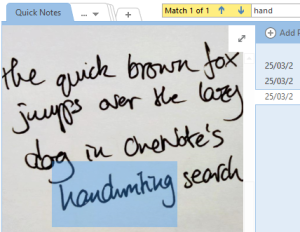 On the topic of OneNote (and we’re still talking about the desktop one, not the Modern App version), there have been some updates shipped out to Office365 users that could be interesting – especially the ability to search handwriting, not just scribbled using a Surface stylus or similar, but grabbed from a photo by
 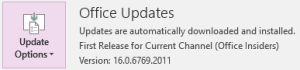 To check you’re on the latest version of OneNote via O365, go to the File menu, look under Office Account and the Office Updates section, and choose Update Now from under Update Options.
Tip o’ the Week 320 – Give Modern OneNote a chance
|
If you really embrace note-taking when having meetings or phone calls, OneNote is an awesome way of collecting your thoughts for future recollection. Sometimes, reading back your notes might seem like jibberish, but at least you wrote something down. There are basically two versions of OneNote on PC – the full-fat, Office app with all the menus and ribbons and Most hard-core OneNote users would default to using the Desktop version since, from the outset, the trusted/modern So, if you’re a OneNote user stuck in the world of Desktop OneNote, there are a few reasons to give the Modern version a whirl, if you haven’t recently.
To to see if you’re running the latest version, try going into the Mobile/Modern app and click
|


