Computers have dealt with files of many types since the earliest days. When the Graphical User Interface took off, it was even seen as a step forward that you could navigate to a file and double-click it to open the application that created it, rather than having to start your word processor and go to File->Open to access a file.
As storage prices have tumbled ($76M/TB in 1985, $6K/TB in 2000 and $11/TB today), and cloud storage has become the default to some extent, then it’s inevitable we all have more stuff, photos, videos, Office documents and more. But search capabilities have not necessarily kept pace, on Windows at least.
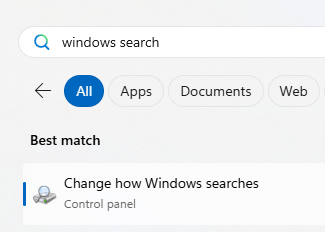
Windows Search
There is an indexing and search feature built into Windows, and has been since Windows Vista for desktop users. It is an evolution of the previous Indexing Service which goes back to NT4 days; basically a background service will notice when files change, and can pick up the data and scan it for keywords.
In principle, you’re supposed to be able to type a search term into the Start menu or the search bar on Taskbar if you have it enabled, and it will find files which contain that word or words in their name, or even in the contents. It’s also used to search Windows own system and settings, so is often the quickest way to get to anything you’d like to change or tune.
The downside is that Windows Search is a little, er, opaque. It can take a while to index lots of content, and if it doesn’t find something then there isn’t much you can do other than try a few switching-it-off-and-on-again tricks before ultimately blowing the index away and recreating it.
Enter File Search
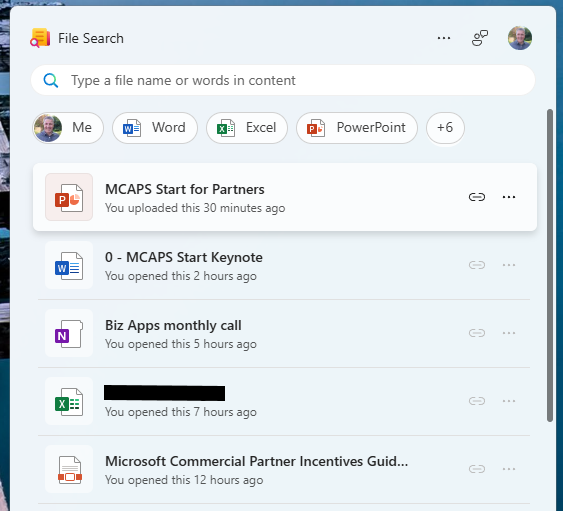
Microsoft has started testing a new M365 “companion” app called File Search, which is used to search files in OneDrive (and only in the M365 commercial OneDrive too, it seems).
It’s pretty quick and does a decent job of finding stuff, as it offloads the actual indexing and searching to the OneDrive service itself. The app itself is a web app running like a Windows app.
When installed, it (annoyingly) starts up at Windows startup; something that can quickly be nixed with the settings menu on the top right. It’s one of a few new companion apps that do other stuff in M365, only one tenant that you’ve signed into (and not working across Microsoft 365 Family as well as M365 school or work accounts, and not working with (MSA) Microsoft Accounts).
Find Everything – well, most things
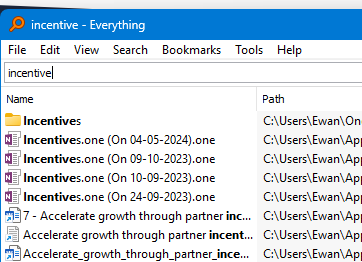
If Find Search is limited to only stuff that lives in the (M365) cloud, a powerful, free, local application called Everything which searches all the files on your PC could be just what you need.
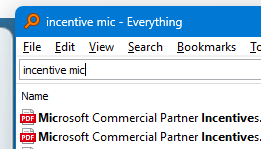
It searches file names only and starts showing you results as you type, and a quick double-click on the results will have the target file open in a jiffy. There is a preview pane too, so will quickly show you what the file looks like. Everything can search the contents of files too, but since they’re not indexed in advance (and with all the overhead that implies), it’s super slow to give results. Best avoided, really.
The app looks basic but is very fast, and the website looks like it came straight from the AltaVista search engine. Still, it works…
What if we could use cutting edge technology to give us more time to do the things we really want to be doing?
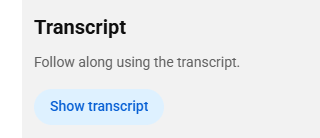
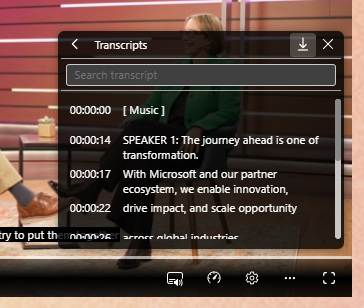
Some online videos have a transcript already published – on YouTube, for example, it’s an option hidden in the description, if the publisher allows it. Clicking the Show transcript button will then display a text stream of what was said, with timestamps alongside.
It’s not searchable, other than by using the browser to try and find text on the page. In the case of YouTube, though, it’s a handy way of jumping straight to a keyword in the video.
If you can get the transcription, you can get it summarised. Why bother wading through hours of corporate chiff-chaff if you could get the tasty bullets extracted for you?
Live broadcasts don’t publish the transcript; clearly, they can’t know what is going to be said and when. Maybe they’ll have live subtitling but that’s tricky to do anything with until after the event is over.
“As live” stuff like corporate events such as Microsoft’s recent MCAPS Start for Partners often don’t make the transcript available ahead of time. Watching these kinds of things in real time, there is one natty technique to get a transcript, even though it does have some shortcomings.
Using Teams, go to the Calendar view and start a new instant meeting…
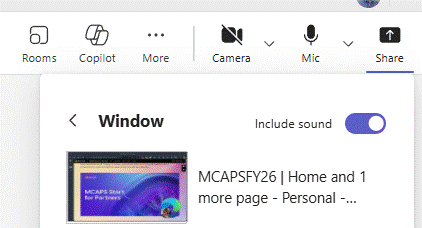
Once joined, you’ll be the only participant and also the meeting organiser. Now Share the browser tab that is displaying the live video with your meeting; share just the window and make sure you’re including sound (so the sound from the window is getting picked up by Teams).
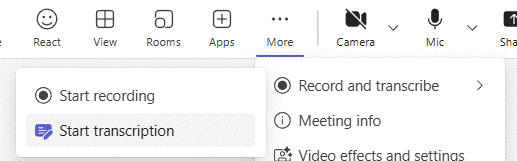
Now, you’ll be able to Start transcription and Teams will record everything that’s being said.
The downside is that everything is noted as coming from you (since it won’t know who is speaking in the real video) and some jargon might be messed up repeatedly. When the meeting is finished, you should be able to look at the Recap feature and locate the transcript.
Download the text to a Word doc and you’ll be able to do some simple editing like find/replace for common mistakes (in the MCAPS event, “FY20 6” cropped up instead of FY26, or “SME and C” instead of SME&C), and maybe even add in the names of speakers at different points if you know them.
The transcript can be fed to your favourite AI tool later to summarise it. More on that later.
Take Two – the replay of video
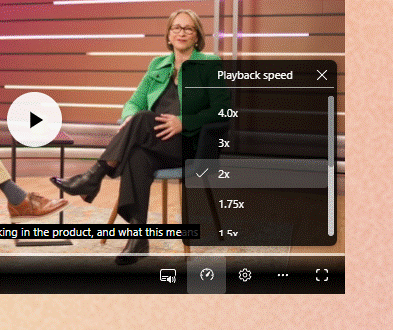
Other training vids etc might be published on-demand, and if they avoid sharing a transcript too, it’s still possible to use the same technique as above to capture what’s being said. You might even be able to alter the playback speed so you can capture the text without investing the actual time to watch the video …
Chances are that 4x playback will be a bit too fast for the transcriber to catch its gist. Stick to 1.5 – 2x and marvel at your own genius.
Take Three – they published the transcript!
Oh, frabjous day! If your video of choice does have a published transcription, it’s likely that it will have correct speaker names, and the creator may have tidied up any mistakes in capturing jargon or abbreviations.
In the case of the Microsoft MCAPS Start event referenced earlier, they did share the transcript as a .VTT file, a format used to define subtitle displays so it’s very chopped up and has timeline information too. Not easy to read, particularly, but we can overcome that.
Click the … option on the control bar and you may see Transcript options; in this case, you can search for a keyword and jump directly to that point in the video, or click the little arrow to download a copy to a VTT file. It’s just a text file that can be opened in Word or Notepad if you insist; it would be worth saving it to your PC and renaming it to something.txt.
Feeding the Copilot
In this example, however you’ve arrived at a transcript file, lucky subscribers can use M365 Copilot to make it summarise the information. ChatGPT would surely do similar, and as long as the video is in the semi-public domain, there’s no worry about sharing all your secrets with OpenAI.
Here’s an example prompt for Copilot:
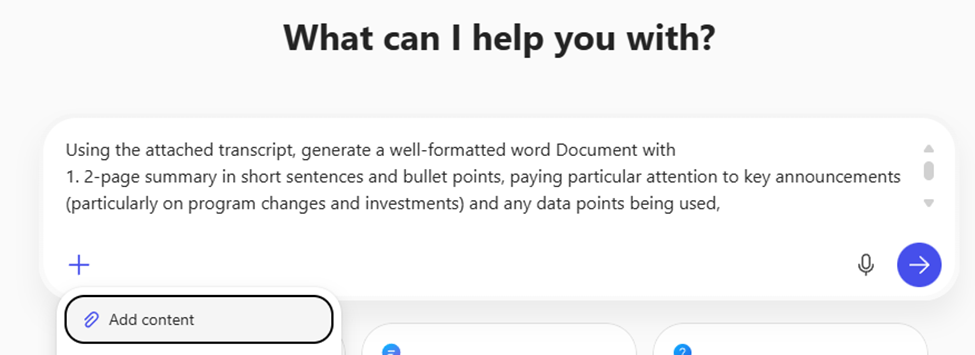
Using the attached transcript, generate a well-formatted word Document with 1. 2-page summary in short sentences and bullet points, paying particular attention to key announcements (particularly on program changes and investments) and any data points being used, 2. A 4-page summary of the key themes, any calls to action and take-aways from the content. 3. the actual text of the transcript ordered neatly into paragraphs of English, highlighting speaker names in bold.
Paste this prompt into copilot.microsoft.cloud and click the + icon to upload the .TXT or .DOCX transcription file you have already saved.
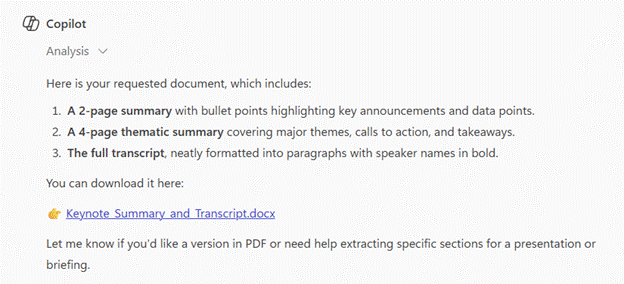
Give it a short while and you should get the document ready to view…
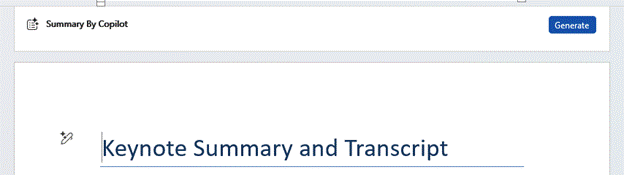
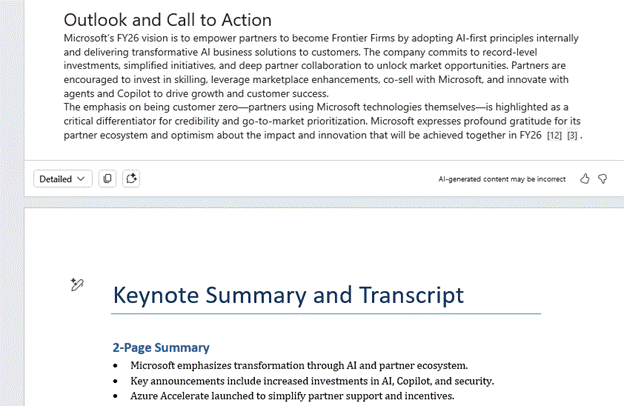
Using this prompt gives a short bulleted version, but asking Word to generate a longer summary in Copilot within the app might also provide a useful bit of readable text at the top, too.
You can tweak the level of detail with the drop-down menu on the lower left fo the Copilot option in Word. Selecting “Detailed” in this example will give a 2-3 page summary of the hour-long transcript, well formatted and easy to read.
When Windows 95 appeared almost 30 years ago, it made a big thing about the Start button and the menu that went behind it. The Start button on the screen – and on the keyboards of newer PCs – was the way to quickly get to everything.
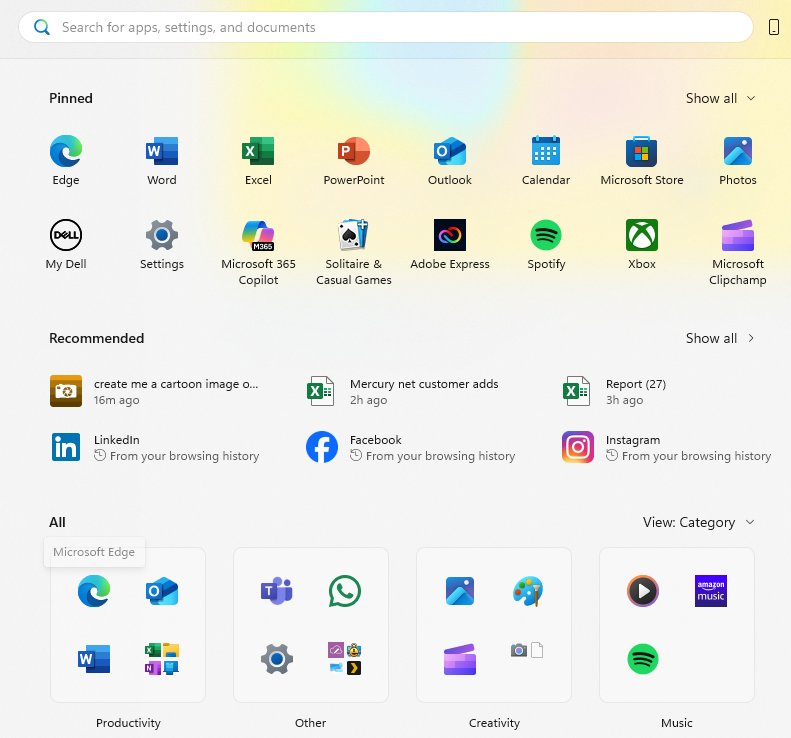
Fast forward to today and the Start menu is visually more arresting and comprised of different categories of icons. At the top are Pinned applications (which may or may not be things you’ve pinned there; Microsoft or other app providers might have decided you want them front and centre). Then there are apps or documents “Recommended” due to your usage habits.
Microsoft is still tweaking with what to put on the Start menu: there’s a new update coming which includes categories of apps, too.
The problem with any arrangement of icons is that when a user goes to access something, they need to figure out where the icon is; frequently used apps might get pinned to the Taskbar for easy startup via muscle memory, so the actual Start menu is infrequently accessed for day-to-day apps. Also, many people live in the browser so they might never need an app to be invoked through an icon.
Start to Run
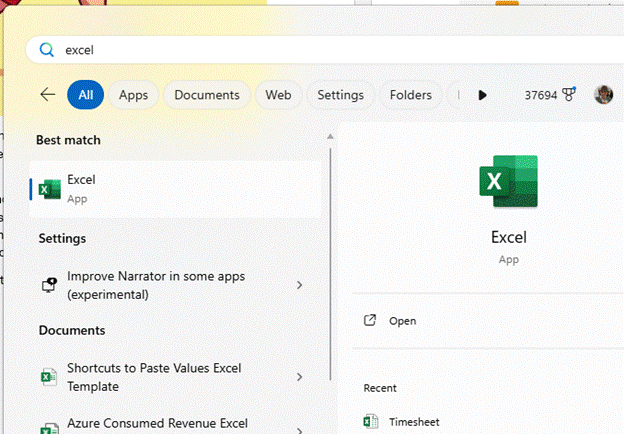
A more consistent way for launching an app might be to press the Start button then begin typing the app’s name. If you don’t have Excel pinned to your Taskbar, for example, it could be quicker to just press Start and typing excel <enter> to launch, than pressing Start and fishing about with your mouse to find wherever the icon is.
The same UI promises to help find documents you’ve used too, so if you know what you want to open with Excel, you could try that instead (eg timesheet…).
Hardcore Runners
For true keyboard warriors, there’s no better shortcut than WindowsKey+R, which launches the simple Run dialog. Generally speaking, you need to know the name of the program’s executable if you want to fire it up from here – eg. Entering “word” won’t get you anywhere, since Microsoft Word is actually winword.exe.
It does keep a useful Most Recently Used list of commands and some Autocomplete logic, though, and entering the name of a folder will open that in Explorer.
There are lots of built-in variables that can jump to places in Windows:
%userprofile% is your own home directory
%onedrive% jumps to wherever your main OneDrive folder is.
%windir% takes you to Windows own director, and can be combined with others like %windir%\system32
To see the full list, drop to a command line and enter set. Everything in the list could potentially be used if you strap a % in front and after it.
Ultra Running
If the Win+R command is too namby-pamby for you and you prefer not to take your hands off the keyboard, there’s another super tool that’s part of the PowerToys package – PowerToys Run. Arguably not really a “Run” or even a “search” function, it provides both with a slew of additional commands and features that can jump straight to different parts of Windows.
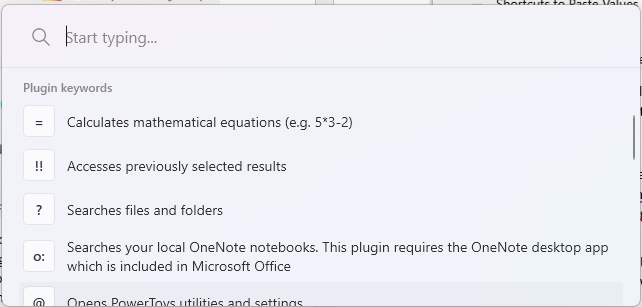
Press the shortcut key sequence to launch it (as long as PowerToys is running in the background), and you’ll get a floating window right in the middle of the screen. There are quite a few “operators” which direct it to search, from using the keyboard to loop through the current windows, to searching OneNote.
Fortunately, PowerToys Run can have its invocation re-assigned to, say, WindowsKey+SPACE.
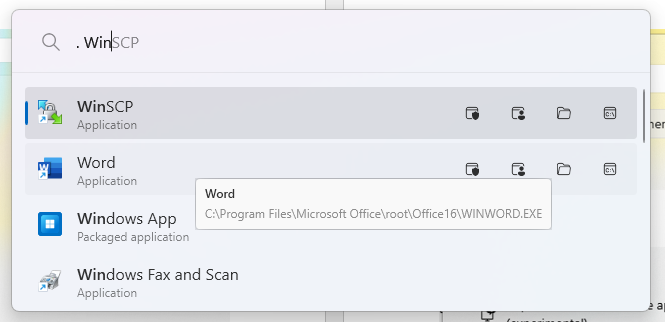
Start a command with “.” and type the name of an app, and you’ll get a suggested list – not just from the app’s name but from its executable, so you could quickly see what to enter into WindowsKey+R in future, for the sake of saving a few seconds.
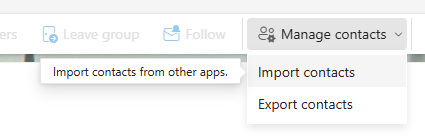
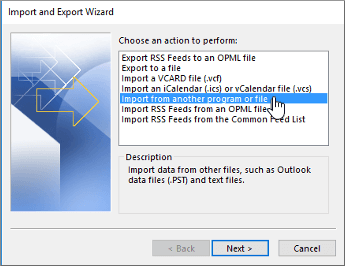
Every email or productivity application which deals with contact info has some attempt at being able to sync, export or import contacts from elsewhere. “Attempt” being the operative word as you’re often left with a flat text file (or CSV) which might need some form of manipulation before it can be imported. Using Export & Import could be the simplest way of copying contacts from one account to another, or even cleaning up duplicates by exporting / fixing / deleting from the source / re-importing.
… while Outlook (classic) has a UI which hasn’t changed much in the last 20 years:
Export from company address book
What if you want to batch-export a load of contacts for colleagues from your company’s address book? Let’s say you’re a group going away on a conference and you want everyone’s number so you can keep in touch? If you’re using Exchange Server on-premises or Microsoft 365 for email, then there’s a “default Global Address List” which has everyone in it. It might also have phone numbers, job title, department and other info, besides just a name and an email address.
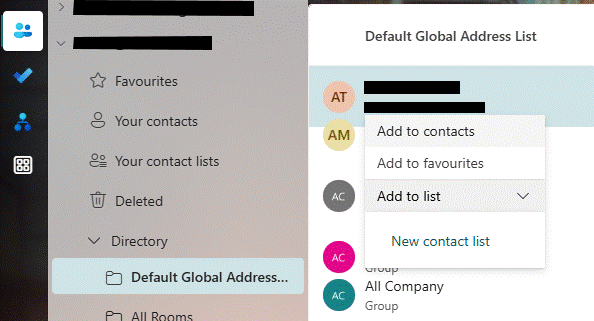
Using New Outlook or Outlook Web app, you can only really operate on a single entry at a time, so it could be a drawn-out exercise to pick everyone you want and copy them to your own contacts.
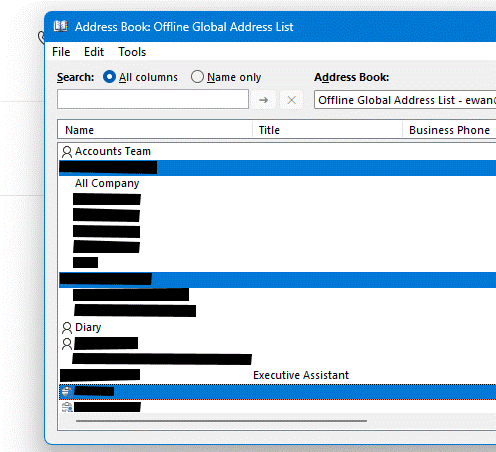
It’s pretty easy using classic Outlook to add multiple contacts from the GAL. Open the Address Book (another piece of UI which is largely unchanged since the original Exchange client released over 30 years ago); SHIFT+CTRL+B is the fastest way to fire it up.
Hold the CTRL key down while you click on multiple names, then right-click on one of the selected ones and choose Add to Contacts. So far, so good. But what if you wanted to add dozens of contacts from Aaron to Zebedee, and you had thousands of entries in the GAL? It could be a bit of a faff to scroll, multi-select then Add to Contacts. If only there was another way.
Exporting the whole Offline Address Book
Speaking of faff, here is one technique which will export everything to a CSV file and then let you filter, sort and ultimately export just the stuff you want. You might be able to do other things like take a snapshot at quarterly intervals, then use Excel to compare the CSVs and see who has joined, left or moved department, changed job titles and so on. Quite Interesting, no?
The source of this goldmine is the Offline Address Book which Outlook (classic) keeps on every PC that’s connected to an Exchange/M365 mailbox, so the user can still see the address list when they’re offline. Now this technique isn’t necessarily for the faint hearted, but at least you only need to do the bulk of it once and then run a simple script whenever you want to extract the data from the latest OAB. It’s not exactly rocket science.
The OAB is held in a bunch of files on your PC’s disk; the format is uncompressed so if you’re foolish enough to open in, say, Notepad, you’ll recognize some text but there’s a lot of other stuff in there. Fortunately, some enterprising techies have pulled together a script that quickly rips through an OAB and delivers a neat CSV of users, and another of groups or mailing lists.
Step One – Install Python
OK, this would send most people running for the hills, but on a Windows PC it’s reasonably straightforward (and for the purposes of the rest of this example, we’re assuming you’re running Windows – if you’re a Mac or Linux user then you’ll need to figure it out on your own). As said, this is a one-off activity, to install both the Python scripting language, and the oab script that we’re going to run later.
Once the install has finished, we need to use a package manager called pip (no, not him) to find and install the oab script.
Start a command prompt by pressing Start and entering cmd,then in the command window, simply enter:
pip install oab
You’ll see a bunch of semi-scary looking warnings; none are really important other than one which is likely saying:
WARNING: the script <name> is installed in ‘<long directory name>’ which is not on PATH.
It will be easier to run these scripts if you add that folder to PATH. Carefully select all the text of the long directory name between the ‘ ’ marks, and right-clickon it. This will copy that text to the clipboard.
Now enter, in the command prompt:
Set PATH=%PATH%;<right-click to paste the text copied>
eg.
This will mean in future, you can run the “oab” script from anywhere. Test that it works by just entering oab in the command window, and you should get a list of all the available options to run that command.
Step Two – Find your Offline Address Book files
Once you have Python and the script installed, you’ll only need to run steps two and three if you want to subsequently go back and re-extract data from the latest Offline Address Book.
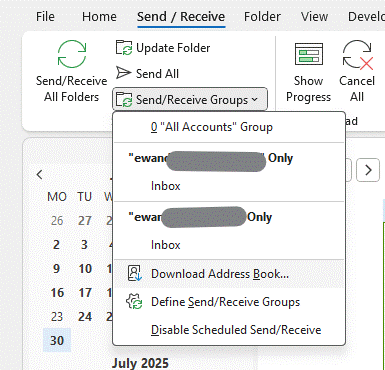
The Offline Address Book (OAB) is built on the Exchange Server or M365 service, usually every day. Outlook (classic) can download on demand, or it tends to pick the latest files up when it feels like it. You probably want to force it, by going into Send/Receive and choosing the option Download Address Book. Keep an eye on the status text in the bottom right of Outlook to see if it’s still downloading stuff, and when it looks like it has finished then proceed.
Now, the trick is to find not only the most recent OAB files, but the ones which correspond to the account you’re interested in; if you have Outlook set up (as in the case above) to connect to several M365 accounts, you may have to try a few times to find the right one – but if you’re in a megacorporation with 500,000 entries and the others are your M365 family subscription etc, then just look for the biggest file. Of all the different files that comprise the OAB, the one we want is udetails.oab.
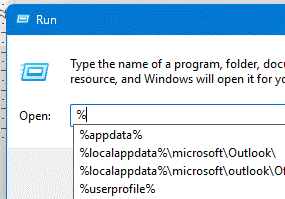
The OAB files are stored in a deeply buried location which can quickly be found by pressing the Start button or Windows Key, and entering:
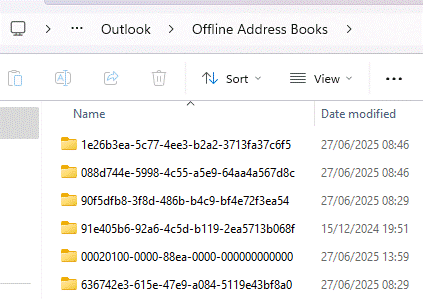
You’ll end up with one or more folders with a GUID for a name; open each one in turn and look for a file called udetails.oab in the most recent folder(s).
Copy that file – assuming it has a recent date/time and looks sufficiently large (a 1,000 user company is going to be in the 1MB-2MB size, probably; Microsoft or Amazon will be more like 1GB) – to somewhere that’s easily accessible; why not try c:\users\<yourprofile>. You can get to that location quickly by pressing Start again and entering
%userprofile%
To prevent getting in the way of all the other stuff that’s in your user profile, you might want to create a folder (let’s call it oab) and drop the udetails.oab file in there for later perusal.
Step Three – Extraction
Now we have the latest OAB data file, it’s a simple matter of pointing the script at it.
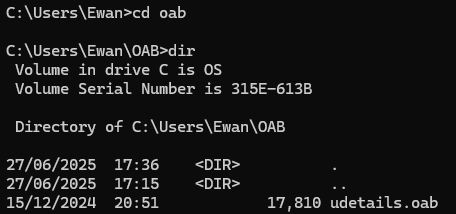
Start by dropping to a command prompt (press Start and enter cmd) then changing directory to wherever you put the file; if you dropped it into %userprofile% then the command prompt will probably start there. If you put it in a subfolder, or somewhere else, then you’ll need to use cd to change directory (and possibly dir to check it’s there):
Now, from the command prompt, enter the following command to invoke the script to do the work (it is case sensitive so take care):
oab -C -o oab udetails.oab
If your OAB file is 100MBs in size, this might take a few minutes, but if more modest it’ll be a snap:
Now open the oab.users.csv file in Excel, select the whole thing, select Format as Table from the toolbar, tell it that your data has headers, and you should be easily able to filter out the rows you want to keep, delete the rest, then import them back into Outlook as personal contacts. Or do whatever else you have in mind.
As described earlier, to repeat the process in future, just update the OAB, grab the latest udetails.oab file again and re-run the script as per steps 2 and 3. Whatever you do with the resulting files, just make sure you do it responsibly.
Following last week’s vaguely Viz-themed missive on Tabs, we’ll expand a bit on the organization of browser tabs.
Edging ahead
Microsoft decided to sunset the ageing Internet Explorer browser with a new one for Windows 10, built on more modern core technologies and codenamed “Project Spartan” (when naming things after Halo characters was all the rage). This new “Edge” browser had some very nice functionality ideas, and the hope was that it would usher in a new era of performance, stability and security, at least compared to IE. In truth, it was slow, resource intensive and a bit flaky. Not all websites worked with it either, since developers would test their sites with browser versions which people actually used already.
One of those spangly new features that was part of the pre-Chromium Edge was the ability to “set aside” tabs; a step up from adding that site to Favo(u)rites, where you’d see a thumbnail of the tab when viewing the ones you’d decided to come back to later. This still sits, 7 years later, with a variety of other pretty neat features (like annotations) which have yet to make it across to the new Chromium version, or at least not to the same fidelity.
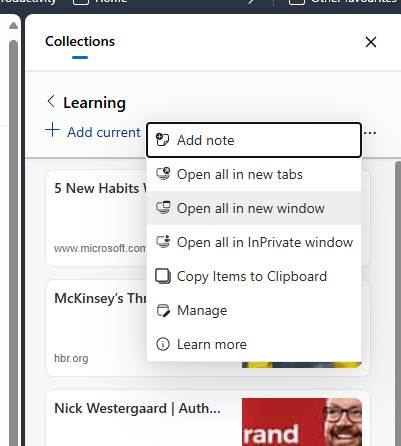
The nearest Edge/Chromium has to this tab set-aside feature is Collections.
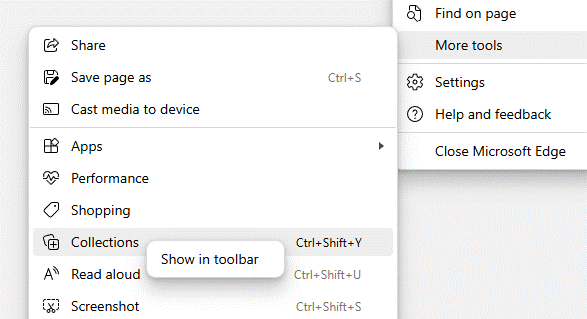
You may see the icon of a Plus sign on your browser toolbar; if not, delve into Settings or possibly even look under More tools to either access it or pin it to the toolbar by right-clicking on the menu option.
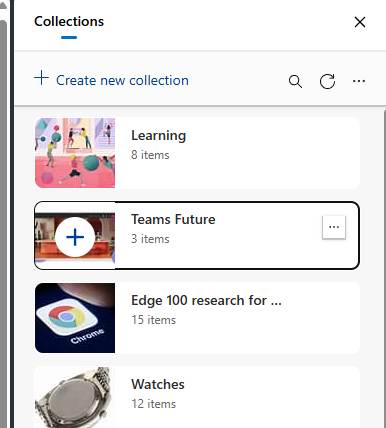
Collections let you group sites/tabs together by topic, add notes to individual tiles or the whole collection, and they sync across multiple PCs using your Microsoft Account or work/school account (aka Entra ID). They even sync to the mobile versions of Edge for iOS and Android, if you’re committed enough to be using that too.
As well as providing a nice way of grouping sites and giving you pinned notes to serve as a personal aide-mémoire, Collections lets you quickly open the tabs in one action, so if you like to keep together several property searches, financial reports, product research pages etc, then it’s easy. You can share the tabs (including your notes) by copying them all to the clipboard as text and links, ready for sending on.
Working together
So far, we have Tab Groups that can be named and more-or-less persisted; there’s Collections which does much the same thing but with a bit more organisation. Collections is specific to Edge, whereas Tab Groups kind-of comes with the Chromium package so is common with other browsers too.
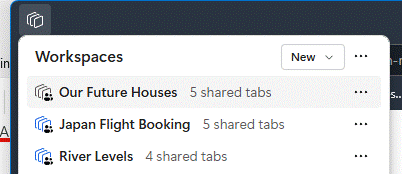
Now, the latest Edge-specific way of grouping tabs is Workspaces.
The idea here is to group tabs that you’re using or working with, and share them with other people – again, using Microsoft Account or work/school ID, so they can collaborate too. Like Collections, Workspaces will sync across different PCs using the same login, but they are not yet supported on mobile versions of Edge.
In practice, when you click a Workspace to open it up, a new browser window will appear with all the tabs open. Any changes you make – adding new tabs, moving to a different part of the site, closing a tab altogether – will be saved and reflected to everyone else also using the Workspace.
You do need to be mindful when using Workspaces that everything is shared, so don’t go opening tabs in that window which you don’t want other people to see. Also, when finished, close the whole Workspace window rather than closing each tab, otherwise you’ll remove the tabs for everyone else too. It’s worth having a play to see how useful this might be in sharing stuff between your family or your co-workers.
This week we’re talking about Tabs, as in browser tabs, rather than any other kind.
Most people are familiar with the idea of having multiple tabs open in their browser – how many could be a sign of a tidy mind or otherwise(tl;dr – most people have 1-3 windows open with 5-10 tabs in each, so typically anything up to 30 open at once) – and any modern browser has added a load of functionality to make it easier to manage lots of tabs.
Having many open tabs does have an impact on the performance of your computer, as there’s additional stuff for the browser to manage, though Edge has a “Sleeping Tabs” feature (Chrome’s version is “Inactive Tabs”), which puts them into a kind of stasis if not used for a while. Look in the Edge Task Manager if you want to see just how much memory and CPU each tab is taking up…
One handy tip for Edge and/or Chrome is that you can search open (and recently closed) tabs – press CTRL+SHIFT+A and you can jump to or reopen a tab easily.
Arrangements
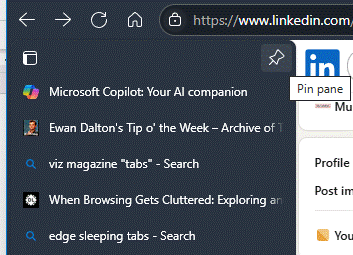
One of the simplest and most effective things you can do to deal with many tabs is to display them vertically, especially if you a nice big, wide screen. The vertical tabs pane can be pinned so you can see the page title (and can be resized by dragging the edge right or left), or you can let it collapse back and just see the icons for each site. Hover over any of them and the whole list will reappear.
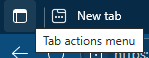
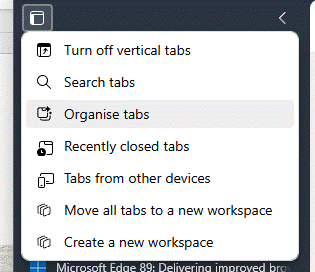
Enable vertical tabs from the settings or by clicking on the Tab Actions menu on the top left of the Edge window (if you’re in horizontal tab mode). The same menu icon moves down a little, to the very top of the vertical tabs list when that view is enabled.
It might help to organise your tabs if you put them into groups, that can be quickly expanded and collapsed or moved around; select whichever ones you want by holding the CTRL key down while clicking on them, and then right-click to add them to a new group. Or drag and drop the tabs into an existing group.
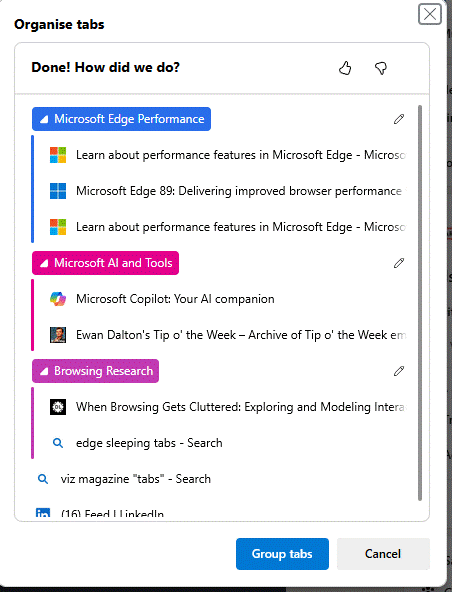
Edge has a neat “Organis|ze tabs” feature which will suggest how to group open tabs together – it’s accessed from the Tab actions menu.
Run the organise tabs option and it will suggest groupings for you based on the titles of each open tab. Click on the pencil icon to the right of each to change its colour and name, and after applying the grouping you can move things around as you like.
Grouping tabs makes it easier to close them all at once, or to move them between browser windows in one block.
Microsoft has had a few goes at building functionality which lets you persist groups of tabs better, arranged into Collections or Workspaces: that’s fodder for another tip.
As was mentioned in a previous tip – #64: Tick, Tock, Time is up (nearly) for Windows 10 – this October sees Windows 10 take a last gasp as it slips beneath the waves. It hasn’t been getting any enhancements or fixes for a while, except for flaws which compromise its security. After October, it won’t even get any of those.
Well, not entirely. For $30 – for one year and then, who knows – extended support will be available for individuals, or a bit more if you’re a commercial operation, via the Extended Security Updates (ESU) program. Enrolment is not yet open but will be sometime before October 14th.
Microsoft has been signalling for a while now that everyone should move to Windows 11, but due to some somewhat particular (and to some, peculiar) hardware requirements for Win11, there are lots of otherwise perfectly workable Win10 machines which cannot be upgraded. More than half of all PC users will – unless they ditch their old machines and move beforehand – be on the wrong side of the line.
Hardware Upgrade Opportunity
Naturally, PC makers are leaning in on this forcing function; “oh dear, all your old PCs won’t be upgradeable so you’ll need to replace them all”. There are some pretty good reasons why Windows 11 has enforced a specific set of hardware specs, though: almost all to do with security. As threats evolve, modern hardware and operating systems have to develop means to counter them – and in the case of Windows 11, that requires a Trusted Platform Module (TPM) 2.0 chip to securely store information used to encrypt and protect the machine. Modern CPUs also need to be used, and even if a 7-year old Windows 10 PC might have a fast-enough processor and plenty of memory, it likely won’t have cutting-edge hardware to ensure it can stay secure.
Even if you could add a TPM 2.0 module, lots of modern PCs won’t have a processor be on the allow list. One of the earliest flagship devices to fall into this trap is the Microsoft Surface Book, itself only 10 years old in October and although it has TPM 2.0, its CPU processor family is too limited.
The fear is that many users will (be forced to?) carry on running Windows 10 – just as lots still used Windows XP years after it was out of support – or they will grasp the nettle, upgrade to new hardware and then just junk their old machine?
The flipside is that modern PCs are more energy efficient, they will be more productive (even just because they’re clean and fresh and not full of old stuff). People used to upgrade much more often, so if you only replacing a PC every 7-10 years then it’s better than it was 20 or 30 years ago, where they might only have lasted 4 or 5 years.
Another way
f you have a 10-year old laptop that hasn’t yet devoured its battery or caused incendiary problems, it might still be useful as a second machine or a hand-me-down to other family members.
One way to keep things running is to check out of the Windows ecosystem altogether.
Since there are over 1 billion users of Windows 10, lots of bad people will be trying to exploit them. Any vulnerability that is discovered in Windows 10 in future could be attacked by nefarious sorts, and since Microsoft won’t be patching it, then you’re at risk of having the crown jewels taken. Even if other operating systems that could run on the same hardware might be intrinsically less secure, they won’t be attacked as much if they are in the minority, so switching to something more obscure could be one form of avoiding attack.
If you’ve a PC – desk or laptop – which is beyond upgrading to Win11 and will be otherwise junked, it might be worth having a play. You could set the machine up to dual-boot between Windows and Linux, and that way could try using Linux and even switch to it as default – leaving Windows there “just in case”, even if it’s not supported and potentially at greater risk from attack.
Chrome Up
A further idea, if you’re sure you don’t need the old machine and are prepared to wipe its Windows clean, is to have a play with Google’s ChromeOS. Designed originally for ChromeBooks – supposedly cheaper laptops that could run more efficiently on lower-spec hardware because they’re not encumbered with all the bloat of Windows – it’s actually possible to run ChromeOS in other places too.
Take a non-supported bit of kit – a first-gen Surface Book, for example – and it’s pretty easy to get the “ChromeOS Flex” variant up and running on it.
· Take a 16GB USB stick or memory card, and prepare it for ChromeOS by running the Chromebook recovery process, but instead of choosing an existing ChromeBook type, tell it you want to use a device called “Google ChromeOS Flex”.
· Once that’s done, restart your target PC with the bootable USB inserted – hold the SHIFT key while clicking on the Power / Restart option, or look for Advanced Startup options in the settings menu.
· You’ll be able to choose if you want to play with ChromeOS Flex by running it off the USB drive, or whether you’d like to wipe the disk on the PC and install it there instead. Choose.
In a surprisingly short amount of time, you’ll be able to walk through some self-explanatory setup procedures. Now to figure out what to actually do with the thing…
There are some gotchas with ChromeOS Flex – it doesn’t have the Google Play store and Android apps cannot be installed, though there are a variety of non-sanctioned ways to install a generic ChromeOS build (which does have Google Play etc). Good luck.
When you’re in a meeting or even a phone call, do you write everything down? Whether you listen attentively and then record a summary of events later (mentally or in other form), or you furiously annotate what is happening in real time, it’s a matter of preference which one works.
Some say the act of writing notes help cement things in your memory, like doing revision at school where you’d write a summary of what you were supposed to learn. Or is note taking a mental distraction where you concentrate on the notes more than the nuance of what is happening in the meeting? Or maybe just live in the presence, wing it, and try to remember what occurred later.
Linear people like writing a list of bullets, grabbing key points, comments or decisions as things flow. Other, more visual types might prefer a mind map(or are they just doodling?) The Cornell method prescribes a way of taking notes during the meeting, then revisiting them to take cues and action items, with a summary for later recap. There are many online guides explaining different approaches – in truth, you’ll probably need to try them and see which works best for you.
Whichever one you land on, it’s worth making sure you actually read the notes back – or like some computer programming languages, you’ll end up with write-only notes: they might have made sense at the time, but even their author could look back later and have no idea what they mean.
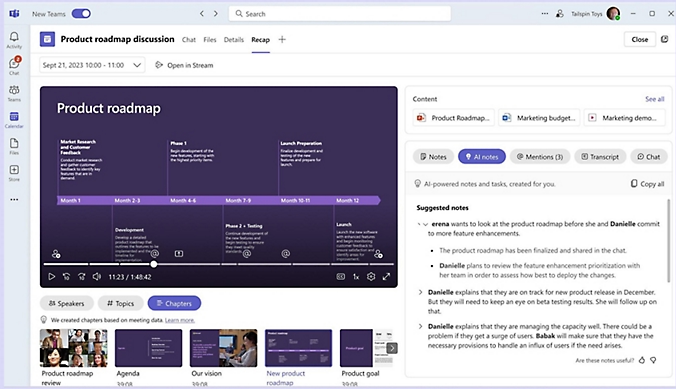
If you’re prepared to pay money then there are many options for having an automatic note taker in your meeting; Microsoft pitches both Teams Premium and M365 Copilot as ways of making recordings or transcriptions of Teams meetings, and looking for topics, actions etc.
The idea is that you can go back into a meeting after the event and see a summary of what happened, with the ability to jump back to a specific point in the recording or transcription (so you can check the note-taker got the gist correctly). You’ll get a list of identified actions and who they’re assigned to.
There are pros and cons to Teams’ approach, though – the recording process is non-intrusive and the analytics takes place in the background, and all the data about the meeting is stored in the M365 tenant of the host.
It’s the organiser of the meeting, however, who normally gets to decide if it’s recorded or transcribed, and only (licensed) users within their organisation will get to see the summary. So, if you’re joining a customer meeting which they arranged, you get no auto-notetaking even if you have a Copilot license on your own tenant. If they share the transcript or recording with you, then you could feed it into Copilot (see Kat Beedim from CPS’s excellent process, repurposed in #47: Using Copilot for (consistent) meeting notes) but that won’t have the same fidelity as a full recording.
Un-Fathomable
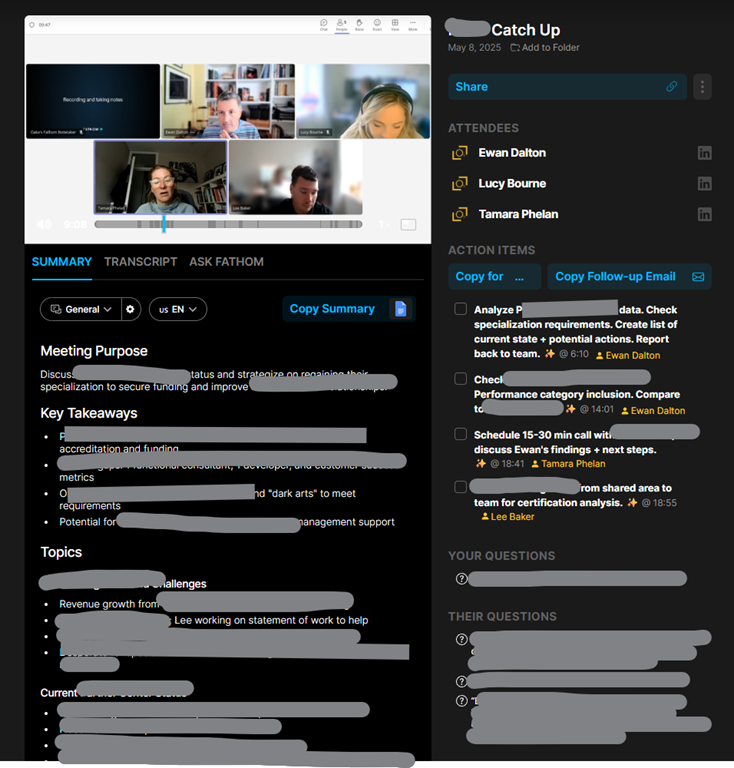
Another approach besides having Teams or Zoom make the summary, is to use a 3rd party agent which will do it for you. The market leader is probably Fathom, though there are plenty of other upstart alternatives.
Fathom works by being external to whatever the meeting platform is; you invite Fathom’s “notetaker” to your meeting and it shows up as an additional attendee. This means you may be able to join “your” Fathom to an external Zoom, Teams etc meeting, if the organiser allows attendees to bring additional invitees.
In a similar vein to Teams Premium, it lets you revisit your meeting with audio/video summary linked to extracted notes. You can also share meetings with colleagues who were not present, so they can review actions from events they missed.
One downside to Fathom’s approach is that it needs to be in the meeting to be able to work; that might be obvious, but it lacks the ability to consume a recorded meeting and generate notes after the event. If you forget to invite Fathom or start it recording, tough.
Also, the very appearance of “so-and-so’s Fathom notetaker” in a meeting which you’re organising can be a bit passive/aggressive; normally you’d be expected to ask if anyone minds you recording a meeting, but having someone bring their eavesdropping sidekick in unannounced can be a bit weird.
The media
Reverting to the old-school activity of people sitting in a meeting, listening, contributing and writing their own notes… what’s the best way to do that?
Pad and pen? OneNote on a laptop? ReMarkable tablet? Ah, that is another can of worms to be opened on another occasion.
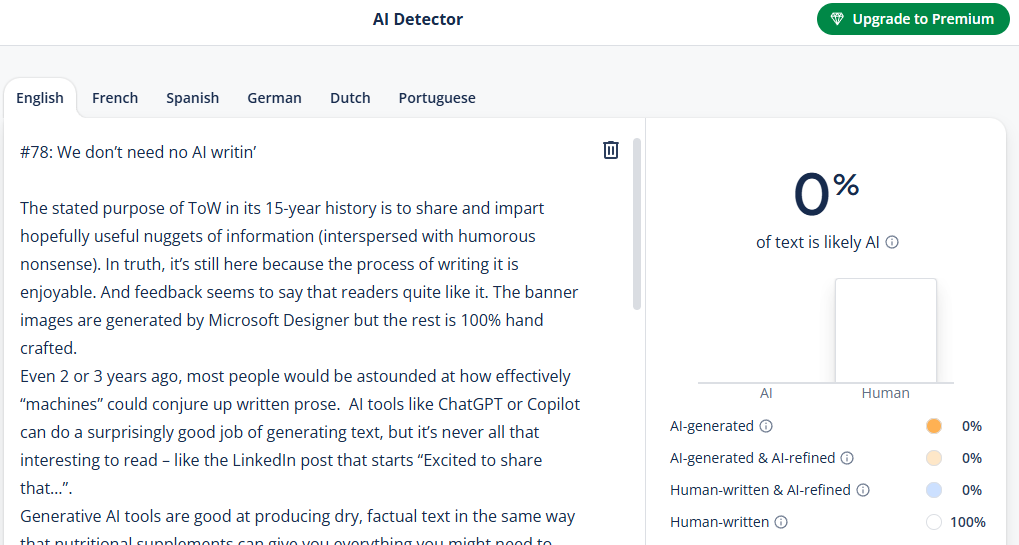
The stated purpose of ToW in its 15-year history is to share and impart hopefully useful nuggets of information (interspersed with humorous nonsense). In truth, it’s still here because the process of writing it is enjoyable. And feedback seems to say that readers quite like it. The banner images are generated by Microsoft Designer but the rest is 100% hand crafted.
Even 2 or 3 years ago, most people would be astounded at how effectively “machines” could conjure up written prose. AI tools like ChatGPT or Copilot can do a surprisingly good job of generating text, but it’s never all that interesting to read – like the LinkedIn post that starts “Excited to share that…”.
Generative AI tools are good at producing dry, factual text in the same way that nutritional supplements can give you everything you might need to survive. But Huel is never going to rival a Michelin-starred dining experience.
Generation and Summary
Reading stories like how Satya Nadella manages his day can be part inspirational and part alarming. He has Copilot give him a precis of all his emails, actions and the likes, but also summarizes podcasts rather than have him listen to them. Why bother watching a movie when you can read a review? Why read a book when you can find out what happens on Google? Sometimes the journey is worth even more than getting to the destination.
Copilot lets you summarize web pages and even YouTube videos, if you can’t find the time to watch.
The danger of these kinds of services is that people will stop reading, watching or listening to content as it was originally produced, because it saves them time and effort. Fine, if someone sends you a dull business proposal when all you want is the tl;dr. Given that most corporate documents and emails are tediously written and poorly constructed, that’s fine. Let one person use AI to generate 10 pages of fluff from a few bullet points, only for its reader to reverse the process by feeding into a summarizing machine.
Is it time to re-evaluate how we read and write? The means of acquisition of information really has an impact on how it is understood and on how the recipient decides if it matters. As a reflection of this realisation that the telling of a story is every bit as important as the story itself, Microsoft has recently launched a limited-distribution printed magazine.
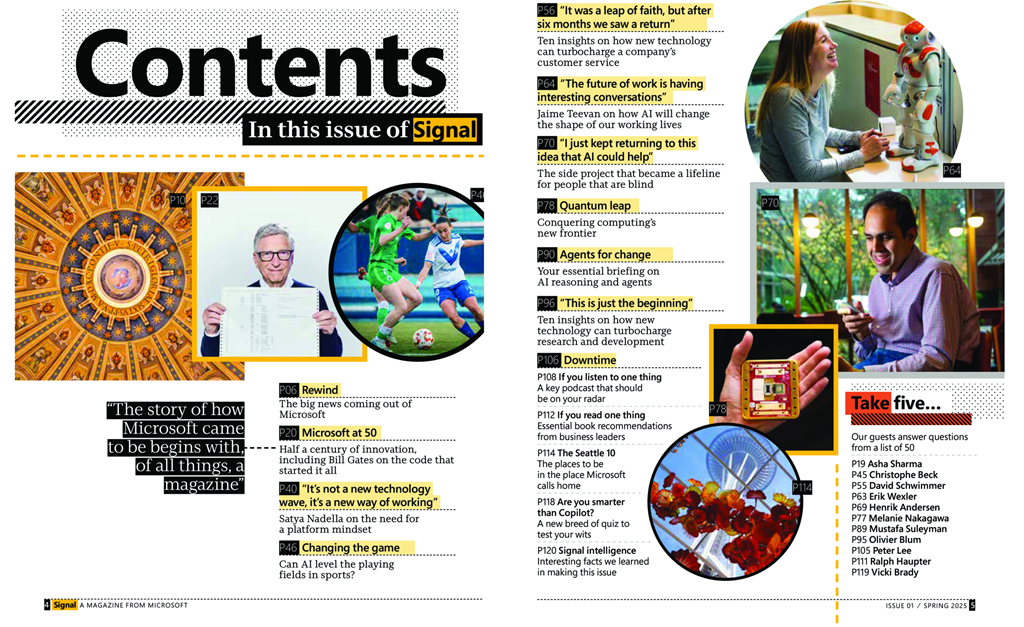
The first “Spring 2025” issue of Signal magazine has tips on what to do in the Seattle area, a retrospective look at some of Microsoft’s milestones in its 50th year, book recommendations as well as “5 things” type quickfire interviews with a bunch of business leaders. It’s refreshingly slow and hand-crafted.
Em and En in the spotlight
No, they’re not two extras from The Famous Five, rather em and en are typographical characters who also double up as handy words in a game of Scrabble. The “em” character (“—” ) is traditionally the same width as a capital M, and the “en” dash (“–”) is half the width of em and the same as a capital N. Historically they’re used in a variety of ways, and vary a bit between American English and British English.
Em dashes are often used in place of a colon or––to make a point––in place of parentheses. Though it’s common to not put spaces around an em dash, it is allowable as long as you it consistently. In Word, you can type an em dash by putting two hyphens next to another character, as long as you don’t use spaces.
En dashes are wider than hyphens but sometimes can be used in place of one, or even instead of em dashes (especially in British English writing). When replacing an em dash with an en, do use spaces – and Word generates an en.
The ChatGPT Hyphen
Why are we blathering about ems and ens given the topic is about AI writing? Well…
Using American-oriented genAI tools might give strange-looking phraseology, depending on your own reference point. Some users are saying that the “em” dash is a tell-tale of AI-generated content, and advising people to go through and remove from their text so they don’t look like they’re too lazy to write for themselves. Instafluencers are saying it, so it must be true.
Using, or not using, certain types of punctuation can be an emotive subject. Publishers may specify rules as to when each is acceptable; the UK Gov, for example, rules out using dashes for date or time ranges. The Grauniad says en is the way to go. Tip of the Week agrees: something – en – something is better than something––em—something, so that’s what is used.
There are various tools out there – Originality.AI, GPTZero, Quillbot and more – which look for common patterns in AI generated docs so you could spot if something is original or not. Handy for teachers marking homework, or office managers looking to see if their staff are being super-efficient or just cutting corners?
Web users might be familiar with a different kind of cookie, signified less like a tasty snack and more an annoying pop-up. Non-Californian American browsers might be less susceptible to this kind of nonsense, but European users have – in the name of “privacy” – been compelled to deal with prompts before they can see a site they’ve clicked on. Like just about any T&Cs or software licensing EULAs, most people just want to get rid of the prompt as quickly as possible so might be drawn to the most-prominent “Accept” button.
It can be pretty eye-opening if you do pay attention – many sites potentially share the way you browse with thousands of third parties. Dive into the more advanced settings on each of the se prompts and you might be able to enable and disable individual “partners” or tweak exactly which kind of information is being tracked. But who’s got time for that?
Mmmmm. Cookies.
Back in the mid 1990s, when the web was taking shape, telecoms company MCI was developing an early e-commerce application with Netscape, but didn’t want their web server to have to track every stage of incomplete transactions. So, the developers took an idea that had been previously used, called a “magic cookie”, as a way of temporarily storing a block of data on the user’s computer. Thus, the HTTP Cookie, aka web cookie and so on, became a standard in 1997.
In general, cookies are supposed to make browsing the web more seamless – when you go to a website, a cookie from a previous visit could be used to continue a previous process or remember some preference you had – like how many items you want in a list or how to sort it – without needing to log in.
But cookies give website developers a raft of ways to silently track users, while also opening the door to all kinds of nefarious behaviours either on behalf of the site owners or unknown 3rd party players.
Look in your browser settings and you’ll see various ways where you can control the usage of cookies, and see what sites have put on your machine…
Visiting a single site, you can see what cookies are in use, and individually inspect, disable or delete them.
Using addins to stop foul play
Even if you are a trusting soul, it makes sense to use some common addins to limit what 3rd parties can see and know about you while browsing the web. Popular tools that might reduce tracking, cookies and block ads include Privacy Badger, I Don’t Care About Cookies, uBlock Origin and many more.
Most of these kind of tools will give you the option to “whitelist” a website, in case turning off all its tracking and cookies actually breaks the site, so there’s little risk in using the well-known ones. Be very careful of any unsolicited add-ons trying to install themselves via popups or any other means.
Check out the EFF’s “Cover Your Tracks” page as well – it gives you a report on how well tied down (through addins or configuration) your browser really is.
Most of the time, the options are straightforward, even if the Accept button is more prominent; many sites will let you Reject cookies and will still work more-or-less intact. There are both temporary cookies that only live as long as your session, and persistent ones which stay on your computer so you can be identified next time you show up. There are a few different types typically used:
· Functional – these are used to track things like your basic preferences on the site, what country you are in and so on. There should be nothing to fear here but if you use an addin or a browser setting to completely block cookies, the site might just not work.
· Performance or analytical – these track how you use the website, and are generally anonymised so just provide the site owner with a way of improving their service.
· Advertising – usually a mix of 3rd party sites which track what you do, across different sites. That’s why if you’re shopping for something one minute, you start to see adverts for the same kind of thing on different websites. Do you want to have your browsing patterns exposed to potentially thousands of advertisers so they can foist more stuff at you?
You could try disabling third-party cookies as one way of avoiding advert spam.
In Google Chrome:
In Microsoft Edge:
There is a school of thought which says you’d be better off rejecting as much as you can when asked for what to allow, in conjunction with anti-tracking and ad-blocking addins. Some sites will still make you jump through multiple hoops to individually disable lots of options to effectively “Reject All”.
Some sites just won’t let you get by without either Accepting everything or by paying for a subscription; your choices then are to accept their meddling oversight, pay their toll, or just don’t look at their pages.