
Every email or productivity application which deals with contact info has some attempt at being able to sync, export or import contacts from elsewhere. “Attempt” being the operative word as you’re often left with a flat text file (or CSV) which might need some form of manipulation before it can be imported. Using Export & Import could be the simplest way of copying contacts from one account to another, or even cleaning up duplicates by exporting / fixing / deleting from the source / re-importing.
GMail supports importing CSV data or individual contacts in the form of VCF files, if you have them. Export to CSV is the norm too.
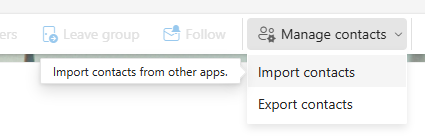
New Outlook and Outlook Web App have a simple mechanism for CSV import/export …

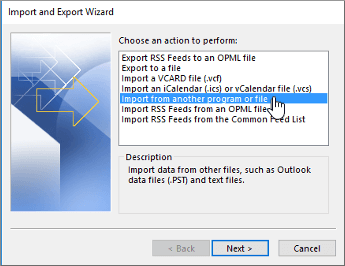
… while Outlook (classic) has a UI which hasn’t changed much in the last 20 years:
Export from company address book
What if you want to batch-export a load of contacts for colleagues from your company’s address book? Let’s say you’re a group going away on a conference and you want everyone’s number so you can keep in touch? If you’re using Exchange Server on-premises or Microsoft 365 for email, then there’s a “default Global Address List” which has everyone in it. It might also have phone numbers, job title, department and other info, besides just a name and an email address.
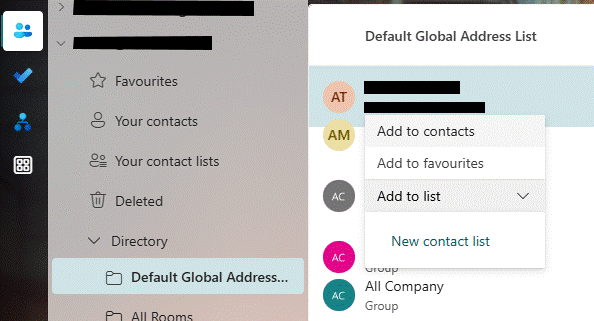
Using New Outlook or Outlook Web app, you can only really operate on a single entry at a time, so it could be a drawn-out exercise to pick everyone you want and copy them to your own contacts.
It’s pretty easy using classic Outlook to add multiple contacts from the GAL. Open the Address Book (another piece of UI which is largely unchanged since the original Exchange client released over 30 years ago); SHIFT+CTRL+B is the fastest way to fire it up.
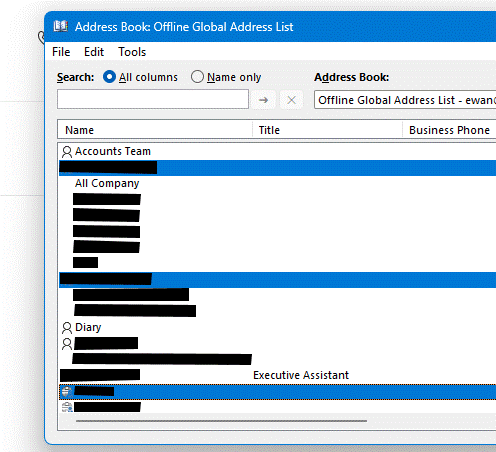
Hold the CTRL key down while you click on multiple names, then right-click on one of the selected ones and choose Add to Contacts. So far, so good. But what if you wanted to add dozens of contacts from Aaron to Zebedee, and you had thousands of entries in the GAL? It could be a bit of a faff to scroll, multi-select then Add to Contacts. If only there was another way.
Exporting the whole Offline Address Book
Speaking of faff, here is one technique which will export everything to a CSV file and then let you filter, sort and ultimately export just the stuff you want. You might be able to do other things like take a snapshot at quarterly intervals, then use Excel to compare the CSVs and see who has joined, left or moved department, changed job titles and so on. Quite Interesting, no?
The source of this goldmine is the Offline Address Book which Outlook (classic) keeps on every PC that’s connected to an Exchange/M365 mailbox, so the user can still see the address list when they’re offline. Now this technique isn’t necessarily for the faint hearted, but at least you only need to do the bulk of it once and then run a simple script whenever you want to extract the data from the latest OAB. It’s not exactly rocket science.
The OAB is held in a bunch of files on your PC’s disk; the format is uncompressed so if you’re foolish enough to open in, say, Notepad, you’ll recognize some text but there’s a lot of other stuff in there. Fortunately, some enterprising techies have pulled together a script that quickly rips through an OAB and delivers a neat CSV of users, and another of groups or mailing lists.
Step One – Install Python
OK, this would send most people running for the hills, but on a Windows PC it’s reasonably straightforward (and for the purposes of the rest of this example, we’re assuming you’re running Windows – if you’re a Mac or Linux user then you’ll need to figure it out on your own). As said, this is a one-off activity, to install both the Python scripting language, and the oab script that we’re going to run later.
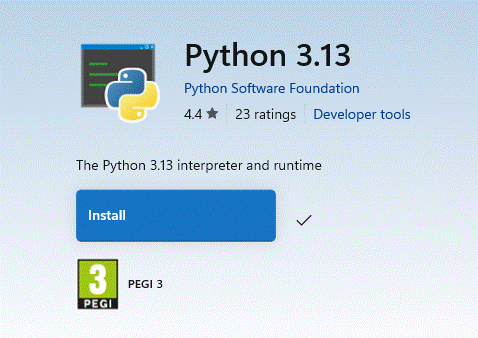
Unless you’re already a Python developer, start by going to Python 3.13 – Free download and install on Windows from the Microsoft Store, hit the Install button and sit back for a bit.
Once the install has finished, we need to use a package manager called pip (no, not him) to find and install the oab script.
Start a command prompt by pressing Start and entering cmd, then in the command window, simply enter:
pip install oabYou’ll see a bunch of semi-scary looking warnings; none are really important other than one which is likely saying:
WARNING: the script <name> is installed in ‘<long directory name>’ which is not on PATH.It will be easier to run these scripts if you add that folder to PATH. Carefully select all the text of the long directory name between the ‘ ’ marks, and right-click on it. This will copy that text to the clipboard.

Now enter, in the command prompt:
Set PATH=%PATH%;<right-click to paste the text copied>eg.

This will mean in future, you can run the “oab” script from anywhere. Test that it works by just entering oab in the command window, and you should get a list of all the available options to run that command.
Step Two – Find your Offline Address Book files
Once you have Python and the script installed, you’ll only need to run steps two and three if you want to subsequently go back and re-extract data from the latest Offline Address Book.
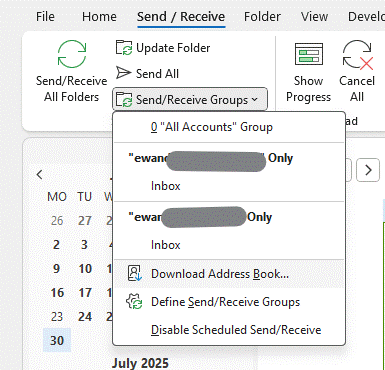
The Offline Address Book (OAB) is built on the Exchange Server or M365 service, usually every day. Outlook (classic) can download on demand, or it tends to pick the latest files up when it feels like it. You probably want to force it, by going into Send/Receive and choosing the option Download Address Book. Keep an eye on the status text in the bottom right of Outlook to see if it’s still downloading stuff, and when it looks like it has finished then proceed.
Now, the trick is to find not only the most recent OAB files, but the ones which correspond to the account you’re interested in; if you have Outlook set up (as in the case above) to connect to several M365 accounts, you may have to try a few times to find the right one – but if you’re in a megacorporation with 500,000 entries and the others are your M365 family subscription etc, then just look for the biggest file. Of all the different files that comprise the OAB, the one we want is udetails.oab.
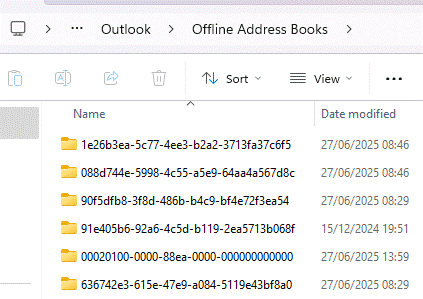
The OAB files are stored in a deeply buried location which can quickly be found by pressing the Start button or Windows Key, and entering:
%localappdata%\Microsoft\Outlook\Offline Address BooksYou’ll end up with one or more folders with a GUID for a name; open each one in turn and look for a file called udetails.oab in the most recent folder(s).
Copy that file – assuming it has a recent date/time and looks sufficiently large (a 1,000 user company is going to be in the 1MB-2MB size, probably; Microsoft or Amazon will be more like 1GB) – to somewhere that’s easily accessible; why not try c:\users\<yourprofile>. You can get to that location quickly by pressing Start again and entering
%userprofile%To prevent getting in the way of all the other stuff that’s in your user profile, you might want to create a folder (let’s call it oab) and drop the udetails.oab file in there for later perusal.
Step Three – Extraction
Now we have the latest OAB data file, it’s a simple matter of pointing the script at it.
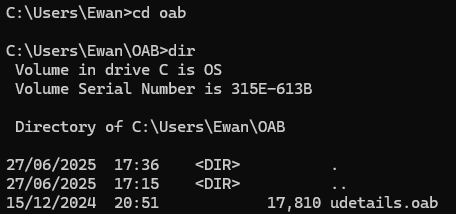
Start by dropping to a command prompt (press Start and enter cmd) then changing directory to wherever you put the file; if you dropped it into %userprofile% then the command prompt will probably start there. If you put it in a subfolder, or somewhere else, then you’ll need to use cd to change directory (and possibly dir to check it’s there):
Now, from the command prompt, enter the following command to invoke the script to do the work (it is case sensitive so take care):
oab -C -o oab udetails.oabIf your OAB file is 100MBs in size, this might take a few minutes, but if more modest it’ll be a snap:

Now open the oab.users.csv file in Excel, select the whole thing, select Format as Table from the toolbar, tell it that your data has headers, and you should be easily able to filter out the rows you want to keep, delete the rest, then import them back into Outlook as personal contacts. Or do whatever else you have in mind.
As described earlier, to repeat the process in future, just update the OAB, grab the latest udetails.oab file again and re-run the script as per steps 2 and 3. Whatever you do with the resulting files, just make sure you do it responsibly.


")


![clip_image004[4]](http://www.tipoweek.com/wp-content/uploads/2024/11/clip_image0044.gif "clip_image004[4]")


")


![clip_image002[4]](http://www.tipoweek.com/wp-content/uploads/2024/08/clip_image0024.gif "clip_image002[4]")
![clip_image004[4]](http://www.tipoweek.com/wp-content/uploads/2024/08/clip_image0044.gif "clip_image004[4]")
![clip_image006[4]](http://www.tipoweek.com/wp-content/uploads/2024/08/clip_image0064.gif "clip_image006[4]")