|
Lists gives an easy way of creating, sharing and managing lists of custom You should be able to see Lists from the menu on Office 365 web apps – start Just like sharing forms or doing task management, there are often numerous ways to do the same thing – and in days of yore, that would have meant several competing and incompatible technologies, encouraged to fight it out with each other to try to ensure that the best one wins. Nowadays, with a more collegiate mindset, consistent ways of doing things show up in different user experiences – like To-Do and Outlook, StickyNotes and more. Expect deeper integration across other apps in due course The new Lists experience is essentially just a great UI built on top of a mature back-end; SharePoint Lists, which have evolved over the last 10+ years, allowing the definition of custom columns and rules to validate data entry. One new frontier is to integrate the new Lists UI into Teams; if you have ability to administer a Team,
Have a play with Lists and think about how your team could use them in place of spreadsheets. Microsofties: There’s an internal story about how Lists came about, and looking forward to where it’s likely to go in the future.
Check out Paul Thurrott’s excellent introduction to Lists. And there’s even a Lists Look Book. |
Tag: Excel


542 –Excel Special Paste
|
As an example, if you took the small table below and wanted to copy and paste the calculated values on row 4, you’d need to deal with the fact that the formula will change – offsetting the D and the 2 reference to wherever you paste it (eg if you pasted the copy into E4, the formula would be =E2-E3) – normally, a powerful and useful function, but a potential nuisance.
An older UI for selecting the options is available if you click on the Paste Special… command at the bottom of the pop-out, or by pressing CTRL+ALT+V to pop out the Special dialog.
One of the more particularly useful features of Paste Special in Excel is the Transpose option – if you select and Copy a row of data then Paste / Transpose it, the data is rearranged as a column (and vice versa). Great news in many cases, but if you want to paste cells and keep the original formulae (without resorting to using absolute references formula references using $ in the formula itself, eg setting =$D$2-$D$3), there are no default options to transpose the orientation of the cells but not change the formulae.
One trick if you ever find yourself in this position, is to bulk change the formulas so they won’t get modified when you paste the cells; do a Find & Replace to change = to something like #=. After pasting and transposing, reverse the process to restore the formula
It’s an edge case but could save you lots of time if you need to do it. For most of us, getting to grips with shortcut keys in Excel would make things more productive – as well as numerous combos of CTRL-something, there are simple keys (like pressing F4, which repeats the very last command … so if you’ve just coloured a cell yellow, move the cursor to another cell and hit F4 to make that one yellow too… if you’re doing very repetitive things, this can save so much time). There are also more complex sequences; press the ALT key in Excel (and other Office apps, too) to see the key combos that
A little bit of legacy/history – press ALT-E then S to jump to the Paste Special menu – why E? Even though it’s long gone, really old versions of Excel had an Edit menu, and the commands on any menu – in any application – that have an underscore under a letter (like Paste Special) are highlighting the key you can press to jump to that command. So ALT E / S used to be the combo to get Paste Special circa Excel 2003, and it still exists today. |


Tip o’ the Week 485 – Excel and the Web
|
A recent tweet from @msexcel showed a simple video on how to grab data from a website – highlighting a capability that’s been in Excel for years but has been refreshed and made a lot easier to use.
Once you’ve tagged the source data, clicking on the icon to the left of the data point will show a pop up with the background detail, or you can reference the fields within formulae to display or manipulate the data values.
See more detail on using the Stock quotes functionality, here. |


Tip o’ the Week 483 – mobile OCR and Office
|
Near OCR functionality is also pervading the slew of freely available Office apps for Android tablets, phones and even Chromebooks, and similar versions for iPad and iPhone. A recent addition to the iOS version of Excel is the ability to scan a table of printed data and use OCR plus a bit of tweaking, to import the data into the spreadsheet. See more here. The same functionality was first made available on Android a couple of months earlier …
Then the OCR goes to work and tries to lay out the data as closely as possible to its source – obviously, your accuracy will be improved by having a well-lit and clear original document, and you’ll get to tweak the contents in context of seeing the OCR’d data and the scan at the same time, before committing to insert it. |


Tip o’ the Week 417 – Resolving aliases in bulk
This might be a very old-Microsoft culture thing, but alias names have always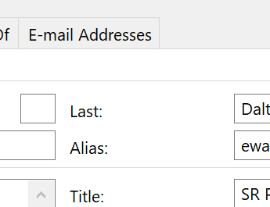 been a relatively big deal within the company; not an alias in the sense of a nom de plume or some alter ego, but a name curiously given to mean your login name. been a relatively big deal within the company; not an alias in the sense of a nom de plume or some alter ego, but a name curiously given to mean your login name.
Before enlightenment, Microsofties were emailed simply by sending to alias@microsoft.com – and still are, so even if the primary mail address is forename.surname@microsoft.com, you could still mail them at forenams@microsoft.com, or whatever their alias is.
In a company with a handful of people, it was easy to remember such a name for when you wanted to drop them an email, but with hundreds of thousands of mail addresses, you might need more room – when Exchange Server came out in 1996, it supported 64 characters in the alias name, though oddly, Microsoft has never embraced longer than 8-character aliases. Back in the day, your mailbox was a folder on a Xenix server, then an MS Mail postoffice, and the folder names were restricted by the 8.3 filename format. There are probably too many legacy systems that also have an employee name represented by their 8-letter alias, and it still kinda works. Aliases – and the cultural phenomenon of calling people not by their name, but by their alias… eg “we had a billg review” – were a central part of the 1995 Douglas Coupland book, Microserfs.
But the true “alias” lives on, even if the Skypey “Contact Card” UI in Outlook does its best to not show you what someone’s alias is (but you can usually still get to Open Outlook Properties, which shows you the traditional Outlook address book view, with alias in the very top section). Lots of reports from Microsoft’s internal systems will refer to an employee using their alias name, so it often helps if you can decipher an alias into the person behind it. Resolving an alias to a name one-at-a-time is all very well, but when looking at a column of alias names in some spreadsheet, it’s a bit of a palaver to turn each of the FORENAMS into something meaningful. Bulk alias resolver in Excel Fear not, worthy reader, for a solution is to hand.
This can be handy if you’re building Excel reports and want to add names to a table instead of aliases – you could sort the list of aliases alphabetically, run them through the resolver, and then reference the table with a VLOOKUP formula so you could hide the column of aliases from your report and show instead the derived real names. |
 The alias, or logon name, at Microsoft was historically an up-to-7- or 8-letter moniker, based by default on surname|first-letter-of-forename, eg billg or steveb.
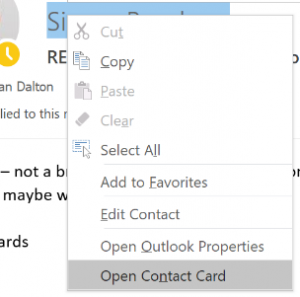 Some people at Microsoft still talk about an email distribution list as an “alias” – eg. “TAKE ME OFF THIS ALIAS!!” as a Reply-All (
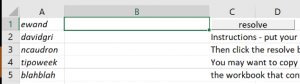
Tip o’ the Week 396 – Handling dates in Office apps
|
In Outlook, any time there’s a date field (like when you’re setting a reminder, or In some date fields (like an appointment start time), if you say “4 days” then press enter or TAB, it will evaluate the new date; if you return and put “4 days” again, it may add those extra days to the last date. Try a few other things like “next Christmas”, “3rd Sunday in November”, “2mo” , “7d” or some special days – there are some surprising ones there, like “Lincoln’s birthday”, and other events with static dates … though nothing that might change the actual date from year to year (like Easter, or Thanksgiving).
Another way might be to insert the current date or time into the text: to do so, press SHIFT-ALT-D, or SHIFT-ALT-T for the current time, or SHIFT-ALT-F for the current date and time. The last one is really handy if you’re taking notes about a phone call, and want to quickly note the time that your insurance company said that everything was all fine, or when you started the indefinite call to the airline. The same shortcuts apply to the desktop OneNote 2016 application and also the OneNote store app.
Since Outlook uses Word as its text editor behind the scenes, the same shortcut keys will also insert date fields into the text of an Outlook email. |


Tip o’ the Week 329 – Fuzzy Duck? Yes, he does
|
Be honest. Do you know how to use the VLOOKUP function in Excel? It has its roots in @LOOKUP from VisiCalc, which goes back well over 30 years – see here for a demo (and, wipe a tear, you missed “VLOOKUP WEEK 2012”). It’s one of the more useful functions, where you can use tables of text to cross reference one another – leading some to create spreadsheets to manipulate data that might be achieved elsewhere by a database join or an IF…THEN…ELSE statement. VLOOKUP (and her friends, HLOOKUP, LOOKUP and the other reference functions) is all very well if you have nicely constructed and controlled data – but what if you have messy text that has been entered by end users? How do you go about normalising that without boring brute force (ie ploughing through it all yourself)? Imagine, if you will, that you have a list of a few hundred company names exported from your CRM system – let’s call them “Partners”. What if you also had many thousands of unique names from people who’ve registered at a conference? (Let’s call that “Partner Conference”). Wouldn’t it be nice to run a report which shows the team that works with each partner, who has registered and where they’re from? If the registration tool allowed anyone to enter free text fields for the name of their company, you’ll get any number of variations, mis-spellings etc – maybe even the odd deliberate spanner. (On the McXFace front, once again, El Reg excelled itself with this headline, though has a way to go to top the best so far… or the subheading of this one, which reads like a line from a DC Thomson cartoon). These names won’t allow VLOOKUPs as they’ll show up as all different, and therefore cross-referencing one source with the other will be difficult. So even telling Jane Smith, who manages the ACME Inc account, that these 10 people are attending the conference, is going to be hard if every one of them registered with a variation of A.C.M.E, ACME Inc, Ac-me Ltd and so on.
The Fuzzy Lookup tool will add extra columns to the source table; showing the text that it thinks is the nearest match, and a score of “similarity”. The technology comes from Microsoft Research, and uses the Jaccard Similarity method of comparing sample data sets. One technique for comparing a couple of different columns is to set conditional formatting on the Similarity column and choose colour scales for easy identification of the ones likely to be correct; or simply put a filter on that column and hide rows below an arbitrary low bar (like 0.6). Then spin down the two columns to the left and check to see if they tally up, given the human eye for spotting similarity, spelling mistakes etc. You could even add a Y/N column to the right so you can manually affirm which is right and which is not, then filter on that to confirm.
Fuzzy Duck? Ducky Fuzz! Does he? |


Tip o’ the Week 323 – Some lesser-known Excel spreadsheetery
|
Spreadsheets did – or do, still – make the modern IT world go round. As it happens, VisiCalc powered the Jobs’n’Woz enterprise to mass success, as Apple IIs were selling (even fully kitted out at $5k+ a time, in the 1980s) to middle managers who were sick of the Data Processing department taking ages to turn around financial reports, so they took to sticking an Apple on their desk and doing the sums themselves. If you’re interested in all of this, see here. This threat from Valley spooked Big Blue enough to worry about the mainframe franchise being under threat, and after a couple of false starts and a skunkworks project called Chess, the PC was born. Lotus software quickly became the de facto spreadsheet provider running on PC-DOS (as it was so fast, meaning the spreadsheet jockeys ditched their Apple IIs and flocked to PCs), but Lotus got distracted with OS/2 while Microsoft’s Windows 3.0 started to gain traction. In place of WordPerfect, Lotus 1-2-3 and dBase, the 1st party Microsoft Office suite took early and full advantage of Windows, ultimately powering Office to the front. So, Excel trumped 1-2-3, just as Lotus eclipsed VisiCalc. That means Microsoft Excel for Windows has been around for a very long time, and there are many functions you’ve probably never used – but there are loads of useful tips that could make your life easier. Here are a few…
|


