637 – Focus and disturbance

clip_image002

Happy New Year! Now that we’re into the second half of 2022, we can look forward to new stuff coming to Windows 11, in the guise of the next update, currently in test with the Windows Insiders and due sometime soon, known as release 22H2.

This new version comes with a bunch of visual and some functional tweaks (which some might argue should have been like that since the release of Win11 nearly a year ago). The Start menu has had some attention, something to be revisited in a future Tip.

One welcome area of deeper integration is a broad subject covered in ToWs passim – the varied ways of managing do not disturb, quiet hours and attempting to focus.

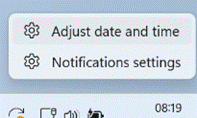
clip_image004In Win11 22H2, the Focus sessions feature which was previously added to the Clock app has now been tied into the Windows shell more neatly – if you click on the date/time on your taskbar to show the calendar (or press WindowsKey+N to see notifications, which does the same thing), you’ll see a little Focus button with an adjustable time next to it.

clip_image006Click that and it will launch a new mode of the Clock app which displays a simple control showing the elapsed time on a circle, and clicking on the square in the middle will stop the session. The expand icon on the top left will launch Clock showing the Focus blade, also displaying To Do Tasks, Spotify (if you have it set up) and a history of today’s other Focus sessions.

Settings for Focus have also been placed in the main system Settings app, providing some configuration on what happens during a Focus session (and you can start a new session from there too):

clip_image008

At least for now, there’s still no Teams or Outlook integration so merely being in Focus won’t change your Teams availability status, nor will it switch Outlook into Offline mode as did the old internal-to-MS “FocusTime” app.

clip_image010The Do Not Disturb feature in Windows 11 also has some rich settings to make sure your machine doesn’t give you notifications at inappropriate times – including a little button next to the notifications list on WinKey+N. If DND is switched on either here or by an automatic rule, you’ll also see a little bell icon emitting Zzs, on the taskbar next to the clock. Subtle yet useful.

clip_image012

Still more focusing options are offered by Viva Insights – that has the ability to proactively book time in your schedule to ensure you can focus, and will silence chats and so on while you’re supposed to be concentrating.

Read more here.

To make your focus all the more effective, maybe go and grab a coffee or something stronger.

636 – That’s not my name (again)

Starbucks name manglingAt a social event this week, a reader asked if topics for ToW’s were ever recycled – the answer? “Of course”. Well, not really recycled but sometimes revisited and updated – which brings us again this week to the topic of name pronunciation.

If people habitually get your name  wrong, you could adopt an easier-to-say handle or just put up with people mangling your name and don’t worry about it. Or you can try to teach people how you pronounce your own name.

In the days of Microsoft Exchange Unified Messaging, you could choose to record your name, as you might have done in those old-fashioned conference call systems that announce your arrival into a call. Exchange UM let you call in to set your voicemail greeting, manage your calendar and so on. That made a great demo back in the day, but presumably didn’t get used enough as it has now gone away.

Outlook address book with speakerFor a while, if your organization used UM and you’d bothered to set your name, you’d see a greyed-looking loudspeaker icon next to yours or others’ names in the address book. It’s not there anymore, now – too bad.

LinkedIn speaker An alternative way of sharing your preferred pronunciation is to use LinkedIn – if you record your name, it’ll show up on your profile and you can make it public so that anyone can listen to it.

To make the recording, you’ll need to use the LinkedIn mobile app, not the regular browser view.

LinkedIn profileTap on your own photo in the top left of the LinkedIn app, then choose View Profile, then tap the pencil icon to edit your profile.

Look in your profile settings and you’ll see options like recording your name or listing your preferred pronouns, as well as the usual headline, title etc. After recording your name, others will see the speaker icon on your profile, and clicking it will play your voice.

Record video on LinkedInAnother neat option is to record a short video which previews if someone views your profile and plays fully if they click or tap on your photo.

Just tap on your own profile picture in the app, and you’ll see an option to edit it and also add a video.

Separately, on the topic of how to say various words, YouTube has a variety of pronunciation tutorials.

635 – Outlook Wunderbar and Full Screen

Outlook iconMany Office users rely so much on Outlook, it’s their most-used application by far. Over the years, numerous other apps – such as Yammer, Slack or Teams – have presented other ways to collaborate and communicate yet with billions of messages being sent every day, email just doesn’t seem to slow down.

Outlook 2003 WunderbarThe bones of the current Windows release of Outlook date back to Outlook 97, with some dialogs and settings having changed little since even if the main UI has been refreshed over the years. One recent change was the further evolution of Outlook 2003’s “Wunderbar”, the menu on the bottom left of the main Outlook window that switched views between mail, calendar, tasks etc (yes, it really was called that internally – look in the Registry).

Outlook 2016 navigation barBy Outlook 2016, the navigation bar had collapsed into a series of icons along the bottom, which did the same thing but took up less screen real estate. It’s long been possible to use keyboard shortcuts to jump between the options on the navigation bar – CTRL+1 will go to the 1st one (usually Mail), CTRL+2 to the second and so on. You can reorder the options on the bar if you like, so CTRL+1 could be Calendar if that’s what’s most important to you.

configuring the Outlook 2021 navigation barOutlook 2021 changes things again – the navigation bar has moved to the side, in a UI design shared with both Outlook.com and the Microsoft 365 Outlook Web App.

Other apps can be pinned to the new bar, too – including things like the Org Explorer, which presents a much more graphical way of looking at the org chart than the old Address Book in Outlook.

Adjusting the ribbonMoving these icons to the side of the screen might help organize screen real estate; another option would be to collapse the Ribbon, so you only see the many icons and options along the top of Outlook, when you need to use them.

You could try Simplified Ribbon to reduce the size and hide some of the more esoteric functions.

Show tabs only reverts to a simple menu bar, and when you click on one of the options, the ribbon for that tab is displayed. You can toggle easily between Tabs Only and the full ribbon by pressing CTRL+F1. There are loads of other shortcuts for Outlook though some are a little obscure.

Full-screen modeTo truly maximize your screen area, try going into Full-screen mode;  that removes the menu and ribbon at the top of the screen entirely, including the search box.

If you need to search your mailbox while in full-screen, press ALT to temporarily display the ribbon, and look for the highlighted keys that can jump to specific tab or function.

Press ALT to see shortcut keysPress Q, then type your search, hit enter and you’ll return to your results in full screen again.

634 – M’aidez, m’aidez

Quick Assist logoThe internationally recognized distress signal “May-day!”, as used by pilots heading for trouble among other scenarios, was chosen as an anglicisation of the French “m’aidez”, or “help me”, due to difficulties of understanding other terms over poor quality radio.

With much less serious consequences, those of us with a technical bent might often be asked to help family or friends who have problems with their computer, and may turn to remotely taking over their machine –  from desktop sharing in Teams or Skype, to using software that should be simpler for the technologically challenged to initiate so you can help them out.

TeamViewer is one such bit of software that’s relatively easy to install and configure, so it’s unfortunately a fave of the scammers who prey on vulnerable people by phoning them up and warning that Microsoft has detected a problem with their computer, and they need to get help to fix it.

Microsoft will never proactively reach out to you to provide unsolicited PC or technical support.

Quick Assist updateIf you do want to get or give help from a Windows PC, a venerable in-box inclusion called Quick Assist could be worth a look – it has recently been updated and is delivered via the Microsoft Store, which now has support for any Windows app and not just UWP and PWA. More on that announcement from Build, here.

Sharing security codeThe gist with Quick Assist is that you over the phone, you could talk your victim friend through the process to start it up (Start -> type assist ENTER), then you do the same. The first screen gives an option to enter a code provided, or if you are the one doing the remote assisting, click the button to Assist another person, and you’ll be given a time-limited alphanumeric code to provide the other party.

They type this is to the dialog on their end, and a secure connection is established, whereupon they can choose to share their screen in view-only mode, or they can offer to give you control.

After a couple of prompts to validate that this is really what they want to do, you would see the recipient’s desktop in a window and have a variety of control icons around it, like a short cut to run Task Manager on their machine, shut it down or send messages back and forth between both of you. Unfortunately, the chat history is not preserved but it’s a good enough way to give short instructions.

clip_image002[6]

633 – Muting in Teams

clip_image002You’re on mute” became a catchphrase of 2020, even featuring in London’s New Year firework & drone display at the outset of 2021. A year later, Lake Superior State University added it their list of phrases that should be banned from the lexicon, along with “Deep Dive”, “Circle Back” and “New Normal”. Pioneer even sent aloft a loudspeaker saying “You’re on Mute” in several languages, symbolically firing it into space for good (though it went up as far as 30km, it did come back down again and space nerds will know that actual “space” isn’t regarded as starting until 100km from the Earth’s surface).

clip_image004Some functional improvements in Teams have been released to help manage the state of being muted/unmuted; the applications can even recognise that you’ve started talking but your mic is off and will remind you of the shortcuts to switch it on again.

clip_image006CTRL+Space is particularly useful if you just want to chip in a short comment on a call where most people are muted, rather than fishing around to click on the Mic icon within the meeting. Press and hold to talk and release to go back to being quiet.

We’ve all been in Teams meetings when someone has left themselves unmuted and presumably doesn’t realise – they start talking to someone else in their house / dog barks / they start eating a bag of crisps / sighing noisily etc. Social etiquette will often have the speaker ask, “Oh, does someone have a question?” or the slightly more direct instruction to mute yourself unless you want to talk.

clip_image008By looking in the People pane to the side of the Teams meeting window, you can see who is making noise as their icon will have a halo around it. If you are the clip_image010organiser or have been given Presenter abilities (as is often the default), then you’ll be able to silence the heavy breathers and furious typists by right-clicking their icon and muting them.  It may be slightly passive-aggressive, but the offender gets notified and hopefully will feel a good sense of righteous shame. Unless they’re actually the current presenter, and someone else has pranked them by muting them in mid-flow.

clip_image012There are some other controls aimed at making online meetings less rowdy affairs, by giving the organiser the power to control who gets to speak or show their camera in the first place.

Bear in mind that it only applies to “Attendees” (ie all “Presenters” can choose to make their mic / camera available any time) and by right-clicking on an attendee’s icon in the Participants list, an clip_image014organiser can allow the Mic / Camera to be enabled for that user; note it doesn’t take them off mute, it just gives them the ability to unmute themselves. Just Imagine the horror if an organiser could switch on another attendee’s camera and mic without their involvement.

As we increasingly go back to hybrid meetings where remote participants will join a meeting room full of meatbags, it’s important once more to manage the microphone / speaker dance when several people in the same space join the same meeting. One best practice is to have people in the room log in to the online the meeting too, and potentially use the raise hand feature in Teams before they are asked by the organiser to talk, that way putting them on an equal footing with remote participants. But this will be bad news if those physical attendees don’t fix their laptop audio properly.

clip_image016If you have multiple people in one place who have their mics and speakers on, you’ll have the bad kind of feedback loop, with escalating echo. You could get them all to mute their mics, but the main meeting room microphone will pick up the sound of their speakers too, with the same effect; so in-room attendees need to mute both speakers & mic.

Pay attention to the “yeah, yeah” video and audio dialog that most people will rush through when joining a Teams meeting; there’s a “Don’t use audio” feature which means you’ll join and have no worry about your own laptop causing problems in the meeting room.

If you have a Teams Room system, you might want to join with no video too or you’ll end up with a gallery of attendees who are facing away from their camera, as they look at other people in the physical meeting room.

632 – New Old Things

old and new shoesMicrosoft veteran Raymond Chen has a great developer blog, The Old New Thing, which inspired the subject line for this week’s Tip, coming as it does, hot on the heels of the Build developer conference. There is also timely news around refreshment of old productivity applications.

OneNote has featured plenty in ToW previously, including a mention in the recent Journaling tip, with a nod in SteveSi’s ongoing historical missive which described members of the development team unhappy with the change of name from its code-name “Scribbler”, referring to the new “OneNote” app as “Onay-No-Tay.

A few years ago, OneNote was dropped from the Office suite and was due to be replaced by the new “modern” version in the Windows (now Microsoft …) Store. For a while at least, that shiny new one got all the innovation, even if its brand-new architecture meant it missed a lot of the old app’s functionality. In a somewhat surprising but welcome turn-around, old OneNote was reprieved, and both apps are going to converge at some later point – ie the desktop one will pick up features that only exist in the Store app, and eventually that version will cease to be.

New OneNote UIOld OneNote UIPending an eventual confluence of the two OneNote Windows apps, the desktop one is gradually getting new functionality and a visual refresh. The graphics bring it into line with Windows 11’s theme of rounded corners, subtle animations and a gentle 3D feel. To some, blink and you’ll miss them, but it does make the app look quite a bit smarter.

There’s a more prominent “Add Page” buttonSort and add, with the page sort function that was added back in February 2022 alongside. There are a few other tweaks in the refresh that has started to roll out, like some new Ink functionality with Ink-to-shape and handwriting-to-text like in other Office apps.

More is to come, including improved sharing capabilities and a neat dictation functionality that would allow you to record a spoken explanation for something while using Ink to highlight or illustrate; when another user plays back your monologue, the ink will be synchronised too. For more info on what’s coming, see here.

Results of OCRCopy Text from ImageOne handy feature that has been in desktop OneNote for years but never made it into the Store version, is the ability to use OCR magic to extract text from images. Try pasting an image into a notebook, then right-click on it to Copy Text from Picture into the clipboard. It does a surprisingly good job, even when the pic is not very clear and if the text on it is really small.

Copying screen-grabs when someone is doing a demo in a browser, so you can get the long and complex URL for the thing they’re showing is a particularly useful way of using this feature.

631 – Why does nobody share calendars?

A paper calendarBack in the late 1980s/early 90s, IBM had an internal email system called NOSS – an implementation of PROFS, a text-only mainframe-based system delivered via a terminal.

Even in 1990, NOSS allowed any user to browse a hierarchical directory (showing contact info, job titles, manager/reporting relationships etc), email or instant message anyone, and look at their calendar to see what they block of text about IBM's NOSSwere doing. It was 10 years before you could do all those things using Microsoft Windows and Office. In recent years, Big Blue’s email environment has seemingly been less happy.

When Microsoft Exchange first came out, email was handled with the Exchange client and calendaring was from Schedule+, which had been updated to support Exchange (and lives on in some backward Microsoft lingo, where people who start every sentence with “So,” ask you to send them an S+, meaning, invite them to a meeting). Outlook came along in 1996 and became the preferred and unified way to do email, calendars, address books etc.

Schedule view of free/busySome organisations had a default policy when new mailboxes were created that their calendar was shared Read-only, so anyone in the company could see it. You could open someone’s calendar fully in Outlook or by viewing the scheduling tab in a meeting, where you will typically see if a list of people are available or not. Others might have it that only free/busy info is visible by default, and that is pretty sub-optimal.

With M365 in general, newly-created mailboxes have no calendar sharing set up, and the action is on the user to choose how to let co-workers see their info.

Be a nice person, and check to make sure your colleagues can view your calendar.

Ideally, share so that others will see the title and location of any appointment; useful when someone is trying to arrange a meeting, as within the schedule view they can figure out if you are likely to be able to make the proposed meeting time – if your diary is full of blocks marked busy or tentative, they’ll have no idea if you really are in a meeting or have just marked time to do something that you might be happy to move. Or had a colleague’s FYI notice of being on holiday obliterate the view of your calendar.

In the early days of Exchange/Outlook, if you had read access to someone’s calendar, you could open up appointments, see who else was attending a meeting, download any attachments and so on, unless the appointment was marked “Private” – though it’s somewhat possible to open Private appointments programmatically if you know what you are doing.

OWA sharing persmissionsNowadays, calendar sharing is more granular – in Outlook Web App, go into Calendar and you’ll see the Sharing and permissions option, which will let you choose specific people and give them ability to see various details, or you can change the default for the whole organisation.

OWA sharing persmissions detailIn full-fat desktop Outlook, click on the Share Calendar option on the ribbon, and you’ll get a 1990s-style dialog box Sharing permissions in Outlookallowing you to set the default permissions or to invite particular team-mates to have higher level access should you want them to know where you are and with whom.

If you choose titles & locations, viewers can’t open your appointments to peer inside, so can’t see who else is attending or what the body of the meeting says, but they can at least see if you’re likely to need travel time between meetings. See here for more info on calendar sharing & delegate access.

630 – slimming your PPT

Piles of documentsPowerPoint files can get big. In the scale of small vs large, sending a many-megabyte PPT file around between a few people might not matter much, but if you’re building a presentation that is going to be widely shared, it could cost actual money – data storage costs, bandwidth charges on a website, carbon footprint for transmitting and storing etc.

Estimates of the energy cost to transmit and store data vary wildly, but if 1 GB cost 1 kWh power and the average CO2 output for generation was ~500g/kWh, then even shaving 10MB off a file can make a material difference if it’s going to be heavily used.

There are a few tricks you can follow to make your PPTs less massive – like compressing the images within, meaning that an embedded picture which was originally sized to print on a poster could be re-sized to fit on a screen.

File sizes sortedIf you see a few-slide presentation file and it’s dozens of MB in size, then there’s probably other info in the deck which is not necessary for your presentation. Even more likely is that there are some embedded graphic or video assets which are bloating the size of it. Quickly identifying the cause of such largesse might allow you to ditch the offending slide or resize/remove the content.

A somewhat cavalier way of looking for large things you can torch, is to make a copy of your PPTX file and then rename it so you can look within. The OfficeXML file formats (prevalent in Office 2007 and onwards) use the same compression as ZIP files, so if you rename your file as such, you’ll be able to open it in Windows Explorer or other ZIP handling utilities, to see its innards. Opening the file shows you a folder structure, and if you navigate into ppt \ media then sort by Size, you’ll quickly see what’s making your file so big.

File Name extensions optionActually doing the rename might be trickier than you think, since Windows hides by default such grubby detail as file extensions. One trick is to flip the switch to show extensions again (in Windows Explorer, look under View menu / Show / File name extensions), then it’s a simple matter of changing the file in Explorer by editing the last part of its name from .pptx to .zip.

Renaming file in ExplorerOnce you’ve confirmed in the warning dialog that the apocalypse is nigh and you really do want to change file type, open the new ZIP file and you’re off. Remember to go back in and switch off the Show > File name extensions option if you’re so inclined.

Renaming file, command lineIf you’re still unsure about these new-fangled “gooey” interfaces, you could crack open the command line to do it quickly.

Slide master viewIf all this grubbing about inside PowerPoint files makes you feel uneasy, there is one other trick that could yield dividends – look inside the Master. Since many people create a new presentation by starting with an old one, they liked, it’s very possible there are slide layout templates with embedded graphics that you no longer need – especially if the originating deck was produced for a conference.

Go into View menu and look under Slide Master, which will open a whole new tab specific to the management of these template slides that form the bones of the presentation. You may well see lots of title slides or similar, which have embedded background images – if you know you don’t need those graphics or those layouts, just delete them.

Closing Master viewPowerPoint generally won’t let you ditch a master layout which is being used to format the current slide deck; so, if you have your deck already built and want to distribute it, just go into the Slide Master view, delete everything which looks unnecessary and that PowerPoint will allow you to, then Close the Master view to return to the main menu. Once you’ve checked that the presentation format hasn’t been garbled, go File > Save As and give it a new name. Now compare the size of the new and old files.

Super Massive background graphic

This title slide in the Slide Master view had a graphical background which was 17Mb in sizefile sizes compared; just deleting all the unnecessary visual slide templates dropped the size of the original file from 110MB to 26MB.

Compress pictures dialogRunning the Document Inspector to remove other content further dropped another 1.5MB.

Selecting an image from one of the 70-odd slides in the deck, and choosing Compress Pictures from the Picture Format tab reduced it again to only 11MB, or 10% of the original file size – all for a few minutes’ effort.

Tools from Save As dialogGoing back to the original 110MB file and opening File > Save As, then choosing More options… will open a traditional Save As dialog box; on the bottom is a Tools > submenu which allows you to run the Compress Pictures function at the point of saving the file, so reducing it to 1/3 of the original size, for literally 15 seconds’ work.More options of Save as dialog

NB: the irony of sending a 2MB email to thousands of people, and sharing online and on LinkedIn, is not lost.

629 – Edge Task, Man

clip_image002Following on from ToW #627, which talked about the efficiency of the latest versions of the Chromium-based Edge browser, avid reader Brad Wilson commented on another natty feature of the ChrEdge Edgmium Edge browser: the built-in Task Manager.

If you’re in Edge already, press SHIFT+ESC, or go to the “…” menu in the top right, choose More Tools > and find Browser task manager under there. Even though the main Windows Task Manager has been overhauled recently with extended support for Edge, the browser task man gives even more insight into what’s going on with the various tabs, extensions and supporting processes.

clip_image004For one, you can see specifics about the different bits of the browser to find out if things are bogging down and start to troubleshoot why, and kill off potentially rogue processes if you feel like living dangerously.

Right-click in the task list to add more columns to the display, like CPU Time to show longer-term vampire processes, or Profile, to display which of the potentially multiple browser profiles are hosting that tab or extension.

If the browser is taking up a bit more CPU or memory than you think it should, it may be time to prune the installed extensions list somewhat (disabling certain extensions from lesser-user profiles or removing some altogether), or engage in a more protracted exercise to find out where the memory is being used.

clip_image006In further Edge updates, a new built-in VPN feature is being tested; powered by Cloudflare, it will give users signed in with a Microsoft Account an encrypted channel with up to 1Gb of data every month to run through what it calls “Microsoft Edge Secure Network” – it’s not there to let you watch iPlayer or Netflix while you’re abroad, but it could be handy for syncing email on a coffee shop Wi-Fi network. Presumably, when your free 1Gb runs out, you’ll get some warning and an opportunity to add some more coins to the meter.

Also, Edge is now 101, though there’s not much excitement for most users.

628 – Text handling in Excel

Excel logoAnyone who has delved into writing formulæ in Excel will probably have had to manipulate strings of text at some point, possibly to clean up formatting or to convert what Excel thinks is a simple block of text into more meaningful data that we know it to be, like a number or a date.

There are simple ways of bulk handling text without resorting to writing a formula – copy all the names from the To: line in an Outlook email, for example: paste into a new spreadsheet and you’ll end up with pasting email addresses into Excela single line of text containing all of the display names and email addresses in one cell, which you may want to split up, to be of much use.

Text to ColumnsSeparate the text into multiple columns by selecting the first cell, then go to the Data tab and look for Text to Columns, which presents a fairly powerful if somewhat old-fashioned looking dialog box, to step through fixing up your text.

In the example above, we have a “;” separating – or “delimiting” – each address, so clip_image008we’ll use that to split the text across multiple columns.

Transpose Paste SpecialSince we might want to create a table of names / addresses, select the cells spread across the columns, copy or cut them to the clipboard, then on a new line below, right-click and look for the Transpose option under Paste Special. Once that’s done, feel free to delete the original top row, or clear the contents of the first cell as we might come back to that row to add column names later.

There is some other cleaning up to do with this text, though; the Text-to-Columns function chopped everything at the “;” but there’s a space which follows the semicolon, so all the Display Names after the first one have a leading space. We could repeat the Text-to-Column feature on the selection again, but use a Space as delimiter now – Preview Text to Columnsunfortunately that would mangle the display names into multiple columns, and if we had a smattering of users with middle names or 3 or 4 part names common in many countries, it could make things look even worse.

Use custom delimiterUsing the leading “<” of the email address as the delimiter is probably simplest, as it will separate the name(s) and email addresses out, though it does still give us a few tidying-up challenges, as there are spaces we don’t want and a trailing “>” at the end of every email address.

In cases like this, it’s easier to use a formula to clean things up – the Trim function being a good place to start; it removes both trailing and leading spaces in string, so the name can be fixed up into a new column.

Since we know the email address has one errant character – that trailing “>” – left behind from the earlier text-to-column operation, there are a variety of ways to strip it off. There’s theclip_image016 =LEFT() function, which keeps the left-most (n) characters of a string – so by combing the LEN function and knocking off a single character, we can chop the final character off.

After all this palaver, you might be thinking that some of this clip_image018chopping around and formulaic string-handling can get a bit confusing as you start to nest operations within each other. Luckily, the Excel team has released some powerful new text-handling functions to try to simplify things a little:

  • TEXTBEFORE – Returns text that’s before delimiting characters 
  • TEXTAFTER – Returns text that’s after delimiting character 
  • TEXTSPLIT – Splits text into rows or columns using delimiters 

TEXTSPLIT functionSo, using TEXTSPLIT on our original pasted text from the email, using “<” as the delimiter for the columns and “>; “ as the marker for the end of each row, gives us a near perfect solution – the only clanger being the trailing “>” on the last address.

You could use another formula to find and strip out any left-over characters like that, or just manually delete the last “>” off the original line you pasted in.

You decide.