659 – Sounding out apps

clip_image002

How you control the sonic emissions from your PC has changed repeatedly over the years; volume is often adjustable by hardware buttons or function keys but more advanced controls are usually found by double-clicking a speaker icon in the system tray. Windows 11 evolved the UI further, in the hope of making it easier to use.

Now, if you click the speaker, you don’t jump to the full blown sound control panel, but to a quick settings dialog which clip_image004controls some commonly used connectivity and display settings, customizable if you like. Desktop PCs typically don’t need Flight mode, but nocturnal users may want to add night light for quickly changing screen colour.

clip_image006Drag the slider by the volume icon and the predictable happens but click the icon to its right and you can easily choose which output device you want to use, if you have several (like headphones, speakers, monitors etc). Clicking More volume settings at the bottom takes you to a more fully-featured volume control panel.

If you have multiple monitors connected to your PC – especially if HDMI is involved – it’s clip_image008possible your machine might expect to route sound to one or more of them; unless you do actually have speakers attached to the monitor, or it’s in fact a flippin’ big television, you’d probably prefer it didn’t show up on the list of potential output devices.

clip_image010Click on the arrow to the right of the device you want to exclude – the ASUS monitor, in this case – and then hit the Don’t allow button: next time you look in the quick volume settings UI, it’s no longer there.

Some apps might have a UX for controlling audio output directly, over-riding the system default and probably sticking with whatever device you choose – Teams or Zoom, for example, may choose a USB speaker/mic or a headset if connected, rather than using the laptop speaker. If the app doesn’t know anything of sound devices, then ordinarily it will use the default (as per the options above), but there is a somewhat hidden setting that lets you tweak things further rather than having to alter the system’s chosen output just for that app or session.

If you want to fire the audio stream from a particular app at a different endpoint than the system default – let’s say you have a Bluetooth speaker connected, but you’d prefer system sounds and the likes to keep coming from your laptop speakers – you could tell Windows to send that app’s audio output to a different place, and the app will never know about it.

clip_image012In the main System > Sound control panel, scroll down to Volume Mixer and click the arrow to open it up. In that page, you’ll see a list comprising the currently-running applications which have made some kind of audio output (in other words, if you want to set an app up, make sure it’s started it and if it’s not in the list, start playing something).

clip_image014

In this case, the Dell monitor does have an amp & speakers attached to its audio line-out socket (where audio is sent to the monitor via the display cable, and it then puts it out to the speakers), so while spending a day of Teams calls and other system sounds emanating from the tinkly-bonk USB speaker, the business of smashing out some banging tunes can go to the bassier speakers.

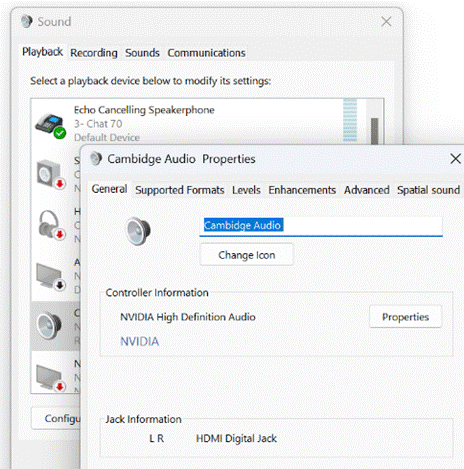
clip_image016Finally, should you wish to give your devices more meaningful names than the ones shown, look for More sound settings in that first System > Sound settings page. This brings up a Windows clip_image018XP-era dialog which allows more precise configuration of devices and levels.

The Sound dialog lets you choose the sound scheme (controlling all the bongs and bings of Windows), configure the speaker arrangement (if you have surround sound etc), or choose all kinds of enhancements and effects.

It also lets you rename the device altogether and set a different icon, so when it shows up elsewhere – including in the shiny Windows 11 Settings app – then it’ll be a bit clearer what it really is

511 – This is the End

clip_image002
Where did that decade just go? clip_image004[4]It feels like just a short skip since 2010, and over the next couple of weeks no doubt the TV schedules will be full of retrospective coverage of all that’s changed in the last 9.97 years. While the global political tumult continues, it’s interesting to reflect on how much technology has moved on in this time, and how some long-term promises still remain frustratingly unfulfilled. Where’s my flying car?

Back in 2010, MySpace was still a thing, the iPad had yet to be clip_image006[4]unveiled, Nokia and Blackberry’s platforms were not yet ablaze, Windows Phone 7 arrived late in 2010 and nobody had heard of Alexa or Siri. The Internet of Things was going to be a big deal, and smart homes and vehicles got to be a hot technology area though at the outset of the decade, seemed mostly a pipe dream.

In January 2020, the electronics industry will gather again for the hypefest that is CES, having moved on from clip_image008 trying to sell everyone on 3D televisions, and is concentrating instead on puffing smart transport, AI-in-everything, more music formats and the inexorable quest for an even bigger telly. Massive 8K screens are the Next Big Thing.

If you’re looking for something fulfilling to do over the holiday season (other than drinking port at lunchtime and eating yourself into a stupor), Ex-Microsoftie Terry Smith has been publishing a collection of great podcasts with a simple but beguiling theme: each guest choses a song from each decade of their life. Check out Music Talks.

Also, read poetry from another former-Softie, Toni Kent, who gives some sage advice on preparations, Christmas shopping or handling the Bin of Shame come January.

Whatever you get up to, have a great break, and thanks for your readership over the last decade (yes, the first ToW mail went out in December 2009 – though took a year to make it onto the blog). See you in the New Year!

Tip o’ the Week 400 – Shake your Groove thing

clip_image001Streaming tunes has been covered by ToW in the past (#284, #350 and perhaps, most pertinently, #361) and if music be the food of love, then stream on. But Groove no more, sadly.

clip_image002The Groove app now offers an option of migrating your stuff over to new BFF, Spotify.

Groove Music Pass (which was Xbox Music Pass before that and originally launched as a service for Zune music players), is/was an arguably equivalent service to many others out there… but despite having similar catalog and pricing as other, newer services, never really got the momentum to be a big success, at clip_image004least in the eyes of the media and the general public.

The Groove app itself soldiers on, as the default music playback app in Windows, and it’s a great way of playing music that you’ve uploaded to OneDrive on a variety of devices. Rumours abounded a couple of months ago about imminent feature updates coming to Groove, so there may still be development to come – time will tell.

On the other side of the coin, the surprisingly successful Amazon Alexa gained a new skillcourtesy of Sonos, it’s now possible to control your Sonos kit using another device, like they entry-level Echo Dot.

Sonos also unveiled a new speaker which has a built-in mic for using Alexa with, so despite Amazon bringing multi-room audio to the larger Echo device, the two companies are working together for the benefit of their mutual end users. (applause)

You can still stream your Groove music collection and playlists to your Sonos, controlled by Alexa, at least until the end of the year, when the Groove Music Pass will cease to be. Spotify integrates into Sonos too, but only if you buy the Premium offering.

Amazon’s own Music Unlimited service is worth a look if you’re already a Prime customer, as you get money off every month, so it could be the cheapest of the main streaming services out there, and is the first (& only, so far?) streaming service that can be voice controlled using Alexa but played back on Sonos. Spotify support is supposedly coming soon.

Tip o’ the Week 350 – Killing me Softly, part I

Many companies have products or services whose time comes, and they are – gently or otherwise – put into maintenance mode, put out to pasture, taken out the back etc. Some never go away entirely but they get superseded by other technologies, or their original reason for being gets diluted to the point where nobody cares any more. Time for a misty-eyed retrospective on some defunct technology…
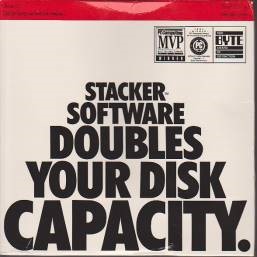
Remember disk compression tools, like Stacker? 25 years ago, when your hard disk was sized 125Mb and cost $350, every megabyte counted, and software like Stacker let you cram more stuff on your drive. Nowadays, you can buy a disk 32,000x as large for one third the price (nearly one sixth of the price if you adjust for inflation) ergo, nobody cares about disk compression any more.

Well, not entirely true, actually – Windows 10 has some really effective file compression algorithms that are used to reduce the size of the OS itself, meaning it can fit on relatively small tablet devices with puny storage capacities. But the market for disk compression programs has pretty well gone.

Turning to music

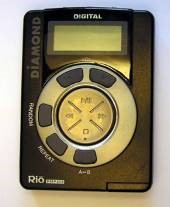
Another side effect of the vastly lower cost in storage, is that compressed music formats are less of a thing these days. When MP3 players were starting to take off, it was common to buy a device like a Diamond Rio, which shipped with a massive 32Mb of memory for only $200. When Smart Media cards were sized at up to 128Mb and cost ~$2/Mb, you had to be pretty selective about what music you’d take with you, and how large it was. If you ripped MP3 files from your own CDs (as opposed to pirating them from Napster), then you’d need to decide how to trade off quality vs filesize.
When encoding audio, imagine that you’re going to be slicing the original sound into many samples every second. The more samples you make, and the larger each individual sample is, in general, the better it will sound.

You’d typically choose whether you want stereo or mono, choose a sample depth (how large each sample is going to be, eg 8-bit, 16-bit, 24-bit; larger is better, to a point) and the sample rate (eg 44.1khz, ie 44,100 samples per second).

Audio on CDs is mastered using 44.1khz sampling at 16 bits in stereo, so that works out at 44,100 x 2 channels x 2 bytes for every second – roughly 172KBytes/sec (approx. 1,411kbps), so a single 3 minute song would take over 30Mb, neatly filling a quarter of your $250 Smart media card in 1998.
[NB: if you are ripping CDs, there is no real point sampling at 24-bit and 96khz – it won’t improve the original sound]

Fortunately, creating an MP3 file compresses the resulting music using a “lossy” format which sacrifices data that isn’t crucial to the aural representation of the sound, though how much it reduces the quality in relation to size of the file depends on the bitrate of the MP3 that’s produced – if your MP3 is only 64kbps, then it will sound quite thin and tinny when compared to a 320kbps file, or the uncompressed music (that’s 10+ times the file size).

Format wars

Microsoft’s Windows Media Audio was created to rival MP3, arguably being more effective at retaining better quality of sound even when using small files / low bitrates, and WMA was supported by quite a few music players, CD players and the like. WMA also featured DRM capabilities so music could be distributed in a controlled fashion: something that was appealing to content owners, but less so to consumers as it complicated their ability to buy and use legitimate media. In fact, if you bought music that was DRM protected WMA, you might find that the rights management is about to expire.

These days, if you’re not bothered about resulting file size, you’re better off using Lossless ripping codecs, like Lossless MP3 or Lossless WMA; then you know that the file you’ve ripped is supposedly indistinguishable from the original, rather than a lossy and therefore inferior copy. You could even rip your media lossless for archival, and run conversion tools to produce a lossy (but still high quality) version that you’d be able to put on your phone, in the car etc. If you have a collection of audio that’s been ripped from CDs to MP3 or WMA over the years, it might be worth revisiting to preserve it for the future in a lossless format.

Lots of people have moved to using FLAC, which is lossless, open and is now widely supported (except, of course, by Apple, who push their own proprietary format) and is a good way of ripping your CDs for archival purposes as well as being supported by most modern playback devices and software – Windows 10 features native FLAC playback without the need for additional software.

Rip me a new one

It’s quite an undertaking to re-rip all of your old audio CDs, but could be a worthwhile exercise to occupy a few hours over the forthcoming holiday season..

One friend decided to do so, and fetched the large cardboard box of CDs from the loft. As it was sitting in the hall, his 9 year-old daughter asked, “Daddy, what are all these DVDs?”. When it was explained they were CDs and they had music on, they realised that she had never known a world where music wasn’t just “there” and that it needed media of some sort.

You’d want to start with a new ripper, not just use the Windows Media Player or iTunes type software – get a dedicated ripper that supports AccurateRip or similar, a technology that reads and re-reads the drive and makes sure it has a true representation of what’s on the original CD. The payoff is a much slower ripping speed, but that’s OK if you’re just ploughing through your collection once, and all for the last time…

Imagine a CD player streaming uncompressed data in real time from the laser reading the surface of the CD, at the rate of 1.4 million bits/second, it’s no surprise that sometimes it won’t get everything clean, so error correction will kick in and smooth over the gaps. Not something you’d probably notice when you’re listening that one time, but if you want to create a perfect copy of your CD, then AccurateRip will make sure it gets close.

Rippers of note include dbPowerAmp (which is paid-for but the ripper can be used for 2 weeks, fully featured, so may be long enough to get your collection done) or Exact Audio Copy, which is free and has been evolving for well over a decade. See a wider comparison here, should you need it. You might want to copy your resulting mahoosive music collection to OneDrive, so you can access it from everywhere.

Tip o’ the Week #284 – Music on OneDrive

clip_image001

Did you know you can now put music on your OneDrive, and stream it to the Xbox music app on your phone, your PC, the web or even your Xbox Console?

You don’t need an Xbox Music Pass to do it, either – though in time, you may find that having both XMP and music on OneDrive is a good thing, especially if music-playing hardware that supports them both is available.

Uploading loads of uploads

The trick is to basically copy or even move all your music to your OneDrive storage – you may need to get some more of that. It can be a bit challenging doing the actual upload, though – what if you’ve got 500Gb of music ripped from your CD collection at home? Try uploading that little lot over your domestic ADSL and you might well break the internet as far as your family is concerned.

Upload speeds on a lot of broadband connections are pretty poor, you see. The A in ADSL stands for Asynchronous, meaning it’s very much not 50:50 up and down. Doing online backup and/or bulk upload of loads of files could take a looooong time, and whilst you’re maxing out the upload bit of clip_image003the link, the download bit will be getting very constrained too – so you could see your overall network performance drop dramatically. Take a look using the Network Speed Test app (for Windows, for Windows Phone) to see the latency (otherwise known as network delay or sometimes PING time – anything into 3 figures is basically bad news), upload and download rates that are available – during heavy usage periods, it’ll seem like your network is performing poorly.

Managing music & OneDrive together

One trick to making sure your music is synced properly, is to put music folder into your OneDrive cache. If you have the OneDrive app installed on your PC, you’ll have a location that is set to sync the OneDrive storage from the cloud onto your machine. If you move your Music folder to be a subdirectory of your OneDrive location, then your PC will sync all that music up into OneDrive for you, and yet it will still show up as local choonz library for playback on your PC, if you tell it so (find Music library in Windows explorer, right-click and you can Move from there).

The downside? It might take weeks to actually copy your music to the cloud and you may not want to nail your broadband to the ground in the meantime. A solution is at hand, however – take your PC into the office and use the network there set up a schedule so your home machine starts OneDrive at times when nobody is using the network, and can kill it off when you might want to.

clip_image005clip_image007Depending on your version of Windows, the specifics may vary a little, but they generally start by looking for the Task Scheduler in control panel – something that’s existed since the very earliest days of Windows NT, though used to be a command-line only thing. Now with Task Scheduler, you can create jobs that do something on your machine according to a load of conditions – running at user logon, or at a time but only if someone’s logged in, if it’s been idle for a while etc.

It’s a snap to create a task that will start up OneDrive on a timed basis clip_image009– just create a new task, tell it when you want it to fire (midnight, when everyone’s gone to bed, and 9am, when everyone’s left the house could be good times?) and set the action to run.

Now, rather than running the OneDrive app directly, you might want to create a little command file that can do some other goodies too – try running (WindowsKey+R) notepad %userprofile%\start.cmd to create a new start command, and paste the following into it (and save it when you’ve done that):


echo Started OneDrive %date% %time% >> %userprofile%\onedrive.log

%userprofile%\AppData\Local\Microsoft\OneDrive\OneDrive.exe

… and, while you’re at it, create a similar stop.cmd file with:

echo Stopping OneDrive %date% %time% >> %userprofile%\onedrive.log

taskkill /IM onedrive.exe 2>> %userprofile%\onedrive.log

clip_image011

Now, schedule the start.cmd to run at the times you like, and stop.cmd to do the same – eg if start is midnight and 9am, maybe stop should be 7am and 6pm. Both will write a line to a log file to say what date/time they ran.

clip_image013clip_image015Assuming it’s running at the time, you should be able to see the OneDrive icon in the Windows taskbar, and if it’s busy uploading you’ll see just how it’s getting on by clicking on the icon.

If you find your network is taking a hammering and you need all the bandwidth you can get for a Skype call, right-click on the icon, choose Exit and then click on the Close OneDrive button. This will stop all syncing of OneDrive content until either you manually start the program again, or until the next scheduled time kicks in.

Tip o’ the Week #216 – Bing Smart Search in Windows 8.1

clip_image001

Hopefully, everyone who was on Windows 8 should be running Windows 8.1 by now. There’s so much that was improved since Windows 8 released, some very noticeably (such as the return of the Start button, if you consider that an improvement) and some, less so – like all the Enterprise functionality that changed. Not to mention the changes that have come in as part of the Windows 8.1 Update 1, as featured in Tip o’ the Week #222

One of the more obvious new features is the Smart Search capability, and yet it can take a bit of getting used to  before it changes the way you use your PC.

You could still use the normal methods for getting to Bing – clip_image004viewing the lovely picture or video on the homepage and searching from there, try just typing your query into the address bar of the browser and let it make suggestions or just carry out the search terms… or use the Bing Desktop App.

clip_image006If you type your search query into the standard Search mechanism in Windows 8.1 (just start typing at the Start screen, or press WindowsKey+S or swipe to bring up the Search charm), then the PC will be able to combine results from your own documents, from popular web sites like Wikipedia, it’ll show you images and videos that correspond to the same term as well bringing results from certain apps (even from sources who have apps you haven’t installed yet).

Try a few special terms out, and you’ll get even more context – a flight number will show you current status and related searches (such as the historical performance and the current position, from Flightradar… who also have Apps for Windows Phone and Windows 8.1 should you want to interact some more, as Paul Barlow recommends).

Type in a place name and you may well be greeted with weather reports, links to restaurant recommendations, details from Bing Travel and other apps in the store that might be relevant.

Enter a musician and you may see results from the Xbox Music app Xbox Music app (latest updates, here), allowing you to play their tracks directly from within Windows 8.1 – and did you know that streaming Xbox Music is free for 6 months for Windows 8.x users?

For more tips on using Smart Search, see here, here and here.

There’s a great opinion piece by Ed Bott at ZDNet, which discusses the role that Bing plays in Microsoft’s future. Well worth a read of the whole thing.