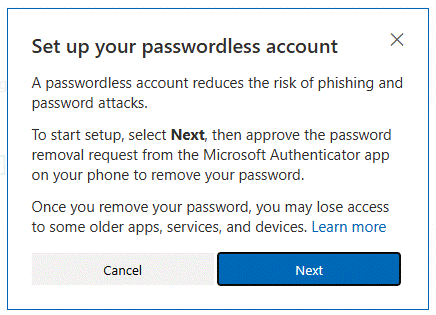
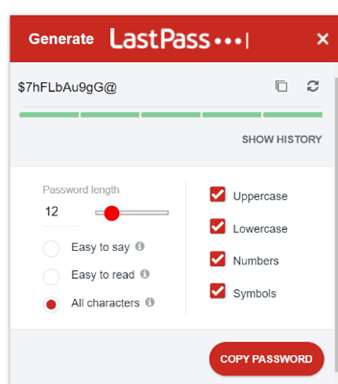
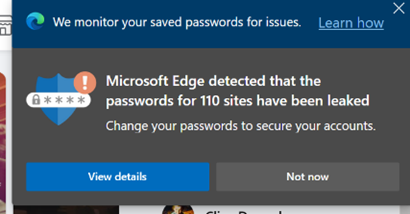
The latest in a line of what-used-to-be-free but is now tightening its belt is LastPass, an excellent password manager that has a lot of users but may end up with a good few fewer. The day after the Ides of March, LastPass Free will only allow use on a single device type, so if you currently use it to sync passwords across desktops and tablets or mobiles, then you need to start paying (and maybe you should) or stick to either mobile or desktop. As soon as the company announced its plans, the web sprung up many articles offering “what is the best alternative to…” type advice. Only a few weeks ago, ToW#561 espoused the virtues of cleaning up your passwords, featuring LastPass and also trailing some features that were coming to an alternative that you might already be using to provide 2 factor authentication on your phone – Microsoft Authenticator. It’s fairly easy to switch to using Authenticator on your device to also sync passwords and to provide the Auto-Fill function which plugs in usernames/passwords not only to sites on your mobile browser but to other apps too. If you already have a load of passwords set up in LastPass or other locations, there are methods to export them and then import the data into Authenticator. In the case of LastPass, you sign into the Vault (either through the browser plugin or directly on their website) and under Advanced Options, select the Export function. It will immediately drop a lastpass_export.csv file into your Downloads folder; be very careful with this file as it contains all your usernames & passwords in clear text.
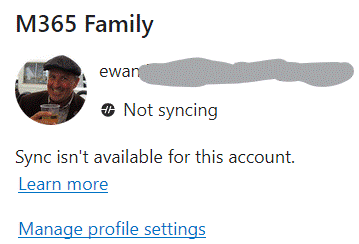
Now navigate to your Downloads folder and choose the lastpass_export file. It might take a little while to complete, but when it’s done, make sure you go back to the Downloads folder and The LastPass browser extension (like other password managers) remains potentially useful on the desktop as it can help to sync passwords between profiles (eg the Work and Personal profile of Edge, if both have the extension installed and logged in using the same LastPass account), or even between browsers – in the cases you might want to use Chrome for some things and Edge for others. Edge on the PC does have password sync capabilities, though not quite with the same level of flexibility – Edge will let you sync passwords, favourites etc if you’re using a Microsoft Account (eg outlook.com) for your Personal profile, and it may do if you have a Microsoft 365 account for your Work Profile. In a twist of fate, if you pay for a Microsoft 365 Family or a small business environment rather than using the free Microsoft Account, your subscription lacks the Azure Information Protection feature that is required to allow syncing. In which case, a 3rd party password sync feature may be your best option, even if you choose to use Authenticator on your mobile device, and perhaps do a periodic export/import from LastPass to keep your mobile passwords in sync. Or best of all, just install the Autofill extension into multiple profiles (or Edge & Chrome), signing into the extension using the same Microsoft Account, to keep the passwords in sync. Tidy. |
Tag: Security
561 – Password clean up
Or just scan them all in then recycle… Maybe it’s time to finally sort out all the passwords you use for different websites. Even though Multi-Factor Authentication is gradually replacing the need to enter a username & password every time you access a resource, there’s still often a need to create a username and password combo when you sign up for something. If you’ve used Edge or Chrome to remember your passwords, you might find there are many hundreds of them, and being weak carbon-based lifeforms, we’re quite likely to use the same ones for many sites. Naughty!
Microsoft Edge offers some password management capabilities – as well as being able to remember passwords within the Edge browser, and sync them between different machines or mobile devices, Edge is also getting to be capable of suggesting and storing complex passwords for new sign-ups.
In some senses, storing passwords and allowing them to be automatically filled in feels like a security risk – anyone with access to your unlocked computer or phone could potentially access your online services. Using Autofill and Authenticator, though, the default setup is to require biometric authentication – so you’ll need a fingerprint or camera, or unlocking with a PIN, before the auto-fill will happen. Also, it’s more important to have complex passwords that are hard to break or guess, and to have different ones for each and every site or app you use. This is the final ToW for 2020. Let’s hope ’21 brings us all better luck. In the meantime, have a great holiday season, stay safe, see you on The Other Side! |
556 – Using MFA more widely
So 2FA – or its cousin, Multi-Factor Authentication (MFA) – is a better way to secure things, as a remote system can validate that the user knows something which identifies them (their username & password, secret phrase, date of birth etc etc) but also has something that identifies them too; a security token, smart card, digital certificate or something else that has been issued, or even just a mobile phone that has been registered previously with whatever is trying to validate them. Although such systems have been around for a while, the average punter in the EU has been more recently exposed to 2FA through a banking directive that requires it for many services that involve transfer of funds, setting up payments or even using credit cards. In some cases, the tech is pretty straightforward – you get a SMS text message with a 6-digit one-time code that you need to enter into the mobile app or website, thus proving you know something (you’re logged in) and you have something (your phone), so validating that it really is you. Or someone has stolen your phone and your credentials… MFA is stronger than 2FA, as you can combine what you know and what you have, with what you are. An example could be installing a mobile banking app on your phone then enrolling your account number, username & password; the know is your credentials, and the have is a certificate or unique identifier associated with your phone, as it’s registered as a trusted device by the banking service that’s being accessed. Using your fingerprint to unlock the app would add a 3rd level of authentication – so the only likely way that your access to the service (for transferring funds or whatever) could be nefarious, is if you are physically being coerced into doing it. 2FA and MFA aren’t perfect but they’re a lot better than username & password alone, and Microsoft’s @Alex Weinert this week wrote that it’s time to give up on simpler 2FA like SMS and phone-call based validations, in favour of a stronger MFA approach. And what better way that to use the free Microsoft Authenticator app? Once you have Authenticator set up and running, It’s really easy to add many
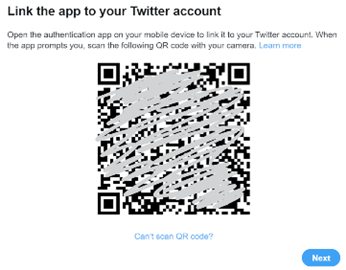
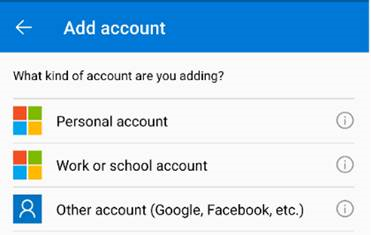
In the Microsoft Authenticator app itself, add an account from the menu in the top right and then choose the option that it’s for “other” – presuming you’ve already have enrolled your Work or school Account (Microsoft/Office 365) and your Personal account (MSA, ie Outlook.com etc). After tapping the option to add, point your phone at the QR code on the screen and you’re pretty much done; you’ll need to enter a one-time code to confirm it’s all set up – rather than getting an SMS, go into the list of accounts in the Authenticator app home screen, open the account you’ve just added then enter the 6-digit code that’s being displayed. This is the method you’ll use in future, rather than waiting to be sent the 6-digit code by text. As you can see from the description, there are lots of other 3rd party apps and websites that support MFA using authenticator apps –
|
503 – OneDrive Personal Vault
Browsing in your OneDrive data folder, you may need to enable Hidden Items in the View tab to even see it. You can treat it like any other folder, adding files and other folders that are particularly sensitive – scans of important but infrequently-accessed documents like passports, driving licenses and so on. Why infrequently accessed, you may ask?
If you had a file in your now-locked PV that you tried to access from Maybe apps will in time come to know that a file is in PV, and prompt the user to unlock before opening? Then again, security through obscurity (the most sophisticated form of protection, right?) might be a good thing here; when the PV is locked, there is no such folder therefore no apps can get access to it without the user taking specific and separate action to unlock it first. Not being seen is indeed a useful tactic.
Unlike in the PC scenario, the PV folder is always shown and indicates if it’s open or locked based on the icon. The Web UI offers other help and advice about how to use the Personal Vault effectively. OneDrive on PC – Setup error 0x8031002c
To work around this and get up and running, try:
|
Tip o’ the Week #221 – Stay safe on WiFi
Following last week’s misty-eyed retrospective on WiFi and Bluetooth, it’s worth pausing a little to pass on a few safety tips too. If you’ve a WiFi network at home which does not have encryption enabled (using a decently strong password – known as a Pre-Shared-Key or PSK – and a modern encryption method, such as WPA2) then you must hang your head in shame immediately, that is, immediately after you go and put a strong password on your WiFi.
What should you call your home WiFi network? Well, if it’s “NETGEAR” or similar, then make sure you call it something else (in case a well-known exploit is found in every NETGEAR router, in which case you’ve just told every kerbside hacker how to break into your network). Also, it’s worth making sure you change the admin password for your router – it’s a piece of cake to find out the default password for well-known routers, such as NETGEAR ones.
How to name your SSID might depend on where you live, if you have any neighbours, if you trust them and so on.
Serial ToW contributor Paul “Woody” Woodman has the mischievous idea of setting his SSID to be something eye-opening – in fact, the WiFi network set up by his phone’s Internet Sharing (as covered in last week’s ToW) has an interesting name…
So, Woody’s on the train, using his phone to connect to the internet, and all the other WiFi users in the same carriage are on their best behaviour…
The Huffington Post wrote about this phenomenon a few years back.
To get a more reliable connection, it’s worth setting your WiFi channel to be something that interleaves well with your neighbours, so you’re not both trying to blast out on Channel 6 – as a guide, check here. Try using a bit of software called inSSIDer to sniff your neighbourhood, see what their networks are called and what channel they’re on, then set yours to something complementary, if you can.
Stay Safe Online
Yvonne Puley made a suggestion about checking what WiFi networks you connect to, after reading a report on the BBC website and seeing an article on the BBC’s Click programme. The gist of the piece is that public WiFi networks – a hotspot set up by your local coffee shop, or even well-known WiFi networks provided by telco’s and the like – are not necessarily all they seem. A simple scam could be for a ne’er-do-well to set up a spoof WiFi network on their own laptop, and the unsuspecting browsers could connect to it and all their online movements could be recorded and tracked. Other hackers could stage a “man in the middle” attack using software that intercepts traffic on legitimate networks and can even decrypt supposedly secured SSL traffic.
In short, there’s no way for you to guarantee that what you do on any public WiFi network is safe from prying eyes. Europol (not to be confused with Interplod, as Arthur Daley might have ventured) says, basically, don’t use public WiFi networks for anything private, like online banking. If you want to scare yourself silly, then watch this Click clip.
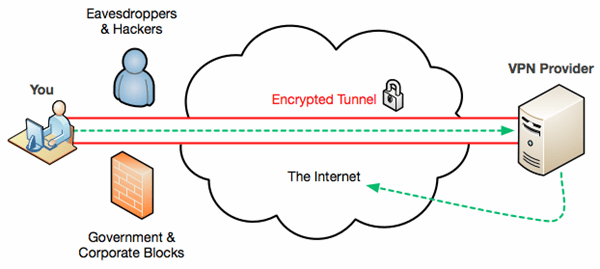
Anything that goes over VPN or DirectAccess should be OK, as the encryption mechanisms used are less susceptible to having a breaker on the side. Even when connected back to base using a more secure connection, though, ordinary web surfing and background updating of apps will typically go out via the public WiFi network. It’s worth also making sure you don’t give too much away – like when you first connect to the network, unless you control it, then you don’t want to “find PCs, devices and content” etc.
For more info on this setting, see here. Looking in the PC’s settings at the connection properties (as described in that article) also lets you see what kind of encryption you have running on the network. If you’re connecting to a WEP network (the traditional method for putting a password on a wireless connection), then think twice about trusting it – Wired Equivalent Privacy is anything but, and can be relatively easily cracked.
Tip o’ the Week #123 –Windows 8: sign in, with Pic & PIN
A short but sweet Tip this week, aimed at those of you who are running Windows 8: if not, why not check out the Release Preview page.
Out of the box, the logon security model that Windows 8 supports offers a variety of ways to log into or unlock your PC, though ultimately it could still requires a complex password just like before and network admins could disable certain features. It might be decided, for example, to not Both the Picture Password and PIN approaches are really aimed at making it easier to sign in when you don’t have a keyboard – unlocking a slate device using a strong password can be pretty laborious with an on-screen keyboard, so both provide a more touch-friendly way of logging in.
Picture-based logon
Picture Password allows the user to take any photo, to choose 3 features of it, and to make a gesture on each of them. An obvious (and therefore – seriously – not recommended… do not do this) choice would be a picture of your child/spouse/dog/self, where you touch on both eyes and then the nose, or swipe along the smile. This don’t-pick-the easy-to-guess-feature approach is somewhat reminiscent of the great Monty Python “How Not to be Seen” sketch*. Fans of the original Halo game may like to hark back with this spoof video.
Anyway, best practice says to choose a picture with lots of potential points of interest, so that you and only you will know which people to tap on, or which trees in the forest to swipe the trunk of, etc. Although Picture Password can be operated with a mouse, its sweet spot is really if you have a touch-capable device.
PIN
This is something of a secret gem, since it’s as useful on a desktop or laptop as it is on a touch device. In a nutshell, setting a PIN on Win8 will allow you to unlock your work PC with only 4 keystrokes (you don’t even need to hit ENTER). As with Picture Password, you need to set your strong password first, and when your password changes, you’ll need to go back in and edit the settings for the PIN. Essentially, PIN and Picture Password are just used as way of unlocking the strong Alph4numer1c Pa55!w0rd that’s been stored already.
To enable either of these options, go into the Settings charm from the main Start Screen, and choose More PC settings, then go into the Users option on the left, and look under Sign-in options.
Do bear in mind that it’s possible that your company’s information security folk (if you have them) may decide that they don’t want people to use the new Picture Password feature, or the ability to unlock your machine with a simple PIN, if either won’t meet their security policies. For the moment, you might find that both are allowed, and if you get your funky Windows RT slate device later in the year (like this one?), you’ll still be able to use these techniques to unlock it.
*Mr Nesbitt learned the first lesson of not being seen: not to stand up. However, he did choose a very obvious piece of cover…
Tip o’ the Week #64–Some IE9 tips
This tip was originally written shortly after the release of Internet Explorer 9, however it’s still valid today. IE9 is the fastest, most modern and most secure browser we’ve ever made (some would say, that anyone has made – recent independent analysis from NSS Labs shows IE9 blocking the vast majority of malware, versus all other tested browsers which fared less well – less than 20% effective, in fact).
If you haven’t installed IE9 yet, just head to http://microsoft.com/ie9 and click the “Download Now” – it’s as simple as that. Reasons to install are here, if you need convincing.
What’s new?
There’s a good overview of the new features in IE9, here. Far too many to cover in one Tip o’ the Week – so it’s a subject we will be returning to.
One key usability improvement is the ability to Pin sites to your taskbar, so you can launch them (or return to them) with a single click: just open the site, click on the tab it’s located in, then drag & drop the tab to the taskbar in order to pin it. Another is the simple display of recent & popular sites you’ve visited, when you create a new tab in IE9 by clicking on the end of the tabs list, or by pressing CTRL-T.
The overall UI is much sleeker and simpler, doing away with lots of icons and even the separate search bar – if you want to search for something, just start typing it into the Address Bar and if it doesn’t get returned via your favourites or your recent history, then it will query your defrault search engine directly from there.
There’s even a “suggestions” option that can be turned on with one click, to suggest search results as you type. This is the off by default, as it would also send keystrokes of URLs you might type in… so the user has to opt in.
Show me the intranet! (add a “/”)
If you enter an intranet URL in the address bar, it will generally try to search online for that “word” – but in the background, IE9 can check if there is a web site available with just that name, and will offer you (displayed at the bottom of the screen) the option of going to that site. Try it with a site you haven’t visited since upgrading – eg hrweb…
Once you’ve said “Yes” once to the offer, if you next enter the same phrase, IE9 will check from your history and see that you really did want to go to http://hrweb, rather than search Bing for it…
If you want to force IE9 to take you straight to the intranet site (and miss out the whole “search Bing, then confirm that you do want to go to the intranet..”), simple put a “/” at the end of the term. So you enter “itweb/” into the address bar (not bothering with http:// etc) and IE9 will take you straight to the designated site. Thanks to MSIT’s John Owen for this tip.