
Assuming everyone has upgraded to Windows 10 by now, it’s a useful time to post some tips that could help the new user get a leg up more quickly. So far, reaction seems to be going well – even some Mac users quite like it (though if you read to the very end, it’s not all a bed of roses) – and if, nothing else, there are some notable improvements over previous Windows versions.
I’m close to the Edge
The new Edge  browser is one of the more celebrated bits of Windows 10, at least for now. It’s fast, it’s standards-compliant (and that’s something of a double-edged sword to a degree, as it means legacy plugins and old-layout web pages might not work). Even naysayers admit that Edge is a Good Thing, on the basis that it’ll put a firecracker into the Webkit bonfire, even if it’s not perfect itself.
 For new upgraders, the first thing you might decide to do with Edge is to restore your favourites from IE – click on the multi-line icon on the toolbar, then the star (which represents Favourites), and click Import favourites to bring yours from IE. Some degree of username/password history will come across as well, though you may need to select the username on the first visit to a web page (as cookies are not migrated across).
To use Edge on intranet sites when attached to a corporate network, you can force the browser to try the intranet address only by adding a trailing slash to the end of the name – eg msweb/. This will stop it from trying to find that name on the internet, if for any reason it can’t get to the site internally.
 If you are find sites that don’t like Edge, you can always click on the ellipsis (…) menu on the top right, and click Open in Internet Explorer, and the page will launch in IE11. Whilst you’re at it, you might want to pin the IE icon to your taskbar by right-clicking on it – then you can always go straight to IE next time.
If you’d like to change your default browser altogether, just type default web browser at the start menu, and that will let you reset to IE or another browser.
Keyboard CTRLs R US
Most of the usual keyboard shortcuts still apply in Windows 10, though there are a few changes & additions – with the removal of the Charms bar,
- WindowsKey+C fires up Cortana with voice input, if you’ve already got that working (see below)
- WindowsKey+S for everyone else, reduced to typing Cortana search commands or not having Cortana at all
- WindowsKey+A for the Action Center – the new notifications area that appears to the right of the screen
- WindowsKey+I for Settings of all sorts – very handy
- WindowsKey+TAB – quick way of seeing all the running apps, across multiple desktops
- WindowsKey+X still brings up the “power user” menu – a great way of getting to otherwise fairly hidden functionality like Device Manager
There have been some keyboard-related tips in recent weeks, and others regarding new apps that come with Windows 10. If you’ve not been using the preview, you might have missed them. See:
- #279 – Windows 10’s multiple desktops
- #280 – Telling time on Windows 10
- #281 – Calculator rebooted
- #286 – Windows Explorer tweaks in Win10
Hey Cortana! Oh, you’re not available… 
Depending on how your upgrade has gone, Brits who run Windows 10 might find that Cortana isn’t showing up as available in the region, even though she’s supposed to be. The same might be true of other lingos – your mileage may vary.
If you’re having trouble getting old Blue Eyes to play ball and you’re in Blighty, you’ll need to make sure all your language settings are tickety-boo.
Check you’ve got the right country set in the  high-level settings, but don’t stop there –make sure the language pack isn’t still searching Windows Update, and that each of the components has been downloaded.
Select the Windows display language shown, and within Options, click on Speech and  make sure the language you speak is correct.
 If you make sure that you have the correct language pack installed, and that it’s set as the speech language, then you should be allowed to enable Cortana.
If you have a microphone on your PC, then you can also switch on “Hey Cortana”,  which will mean she’s listening out for you to say that all the time… and will jump in with a spoken response to your every query. Just make sure your Windows Phone isn’t nearby or you’ll end up cheating on one Cortana with another. Let’s wait for the Cortana vs Cortana Youtube videos.

 on the icon that’s pinned to the taskbar by default, or else simply press the WindowsKey+e. Out of the box, you’ll see a couple of changes to simplify File Explorer when compared to Windows 8, namely to show recent files and folders and the Quick Access pane, as the main display of the Explorer window, rather than
 just showing a list of drive letters or network locations.
 to has been found to partially exist in Windows 8.1 too, so maybe it’s a bit of a hidden gem – when in File Explorer, if you press ALT+d, the cursor & focus jumps to the address bar and you
 can start typing the name of key folders and recent files, and you’ll see the name show up in autocomplete – so to get to Downloads, just start typing down and then with a single press of the down cursor key then enter, you’ll jump straight there. This may seem trivial but to hardened keyboardistas, any reason to
 If you still like using the pointing doodah, you can click on the caret to the side of the icon that shows whatever folder you’re in (and it will change as you move around), and you’ll get a short cut menu that also includes regularly used folders.
 Another neat one, for some at least, is that if you select a folder within Explorer, and go to the File Menu, you’ll get the option of launching a command prompt or PowerShell window with the focus directly on that folder

 the link, the download bit will be getting very constrained too – so you could see your overall network performance drop dramatically. Take a look using the Network Speed Test app (

 Depending on your version of Windows, the specifics may vary a little, but they generally start by looking for the Task Scheduler in control panel – something that’s existed since the very earliest days of Windows NT, though used to be a command-line only thing. Now with Task Scheduler, you can create jobs that do something on your machine according to a load of conditions – running at user logon, or at a time but only if someone’s logged in, if it’s been idle for a while etc.
 – just create a new task, tell it when you want it to fire (midnight, when everyone’s gone to bed, and 9am, when everyone’s left the house could be good times?) and set the action to run.


 Assuming it’s running at the time, you should be able to see the OneDrive icon in the Windows taskbar, and if it’s busy uploading you’ll see just how it’s getting on by clicking on the icon.

 Back on terra firma, if you do need to write emails that may not need to be sent or read over a weekend or during the night, you could try Offline mode: simply go into the Send/Receive tab of the main Outlook window, and click the icon in Preferences.
 sending them, which could be handy especially if you’re bulk-sending. Alternatively, when in online mode, you, you can delay individual emails’ sending time by looking in the Options | Delay Delivery section of the actual message window.
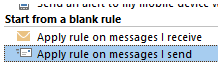 message that this rule will apply to every message…
 synchronised with the server or anything else – so if you hit send and then immediately close the lid on your laptop, your PC might go to sleep and the email will stay in Outbox until it resumes again…
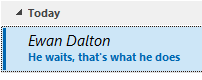 If you get cold feet on sending, or decide you need to edit your missive, just go into the Outbox folder, and if the email shows with the recipient name or address in italics, then it means it’s waiting to be sent – if you open up the mail and then just save it again, it’ll stay in the Outbox but won’t be sent until you edit it again and press the Send button again.

 but still cool updates. One such is the new calculator app, a “modern app” which has been enhanced compared to the old-fashioned
 “


 The calculator doesn’t do currency conversion, but Bing.com
 does a decent job of that – just type the currency symbols or standard identifier into Bing and you’ll get an approximation. Add the quantity too if you like.

 For some time now, the
 the current time and a date picker that’s been redesigned to be
 touch-friendly. Clicking on Additional clocks also launches the new Alarms & Clocks application which integrates a couple of useful stopwatch & timer functions as well as a day/night view of the world map, and a configurable list of locations that you may want to keep an eye on, so you know the time at a glance.


 in the Lync meeting UI. In Skype for Business, during an IM chat or call, you’ll see there’s no equivalent participant button – there’
 s the usual button to show the IM window, which shows the text chat section but not the participants button.
 This has been moved to higher up in the UI – it varies depending on which kind of chat/meeting/conference you’re in. Click on the icon to the left of
 the text (hover and you’ll see the Open Participant List tooptip) and you’ll be able to view that list.


 y View shows you a horizontally-arranged list of attendees’ mugshots, which can be right-clicked to interact with them. Speaker View hides
 all of that, but still shows a picture of you next to the person who’s currently speaking, and Content View hides both in favour of the presentation content that’s being shown (the “Stage”).

 ability to have multiple desktops.
 To access, just click on the the Task View icon on your taskbar – assuming you are showing that icon (if not, right-click on the task bar and enable it). Another means to access it is to press WindowsKey+TAB (remember that

 of the virtual desktops that appear at the bottom of the task view screen – just drag & drop the windows of your running apps.

 Windows Explorer has a search function which can filter found files, based on some attribute or other – so you return files that are only of a particular type or age, or maybe of a specific size. The problem is, the understanding of what is a

 Delete stuff you don’t need
 Navigate to your file location, and make sure can see the file extensions – go to the View tab in Explorer and tick the File name extensions box if you can’t see them. Make a copy of the PPTX file you want to work on, select it and right-click to Rename (or just press F2). Now overtype the .pptx bit at the end with .zip, and agree to the dire warning that the Earth might stop turning if you continue.
 former when you’ve maybe got a video or just lots of high-res pictures embedded, and the latter is a common source of embedded XLS files which might be unnecessary… ie. Maybe you could get away with a simple copy of relevant data, rather than the whole file?). Maybe the best way to slim down the file is to open the un-renamed one in PowerPoint, then navigate to the place where the huge content was and resize, compress or replace it.
 be just to compress pictures – you can get to that from the Format tab when you have a picture selected, and
 individually reduce the size and resolution of each image.
 to every image in the deck.
